Fold fresh berries into a tender gluten free crust to make this black raspberry pie. You can make it with all-purpose flour if you wish, and if you can't get black raspberries, red raspberries make a fine substitute. But if you have access to wild berries or grow them yourself, definitely use them to make this pie!
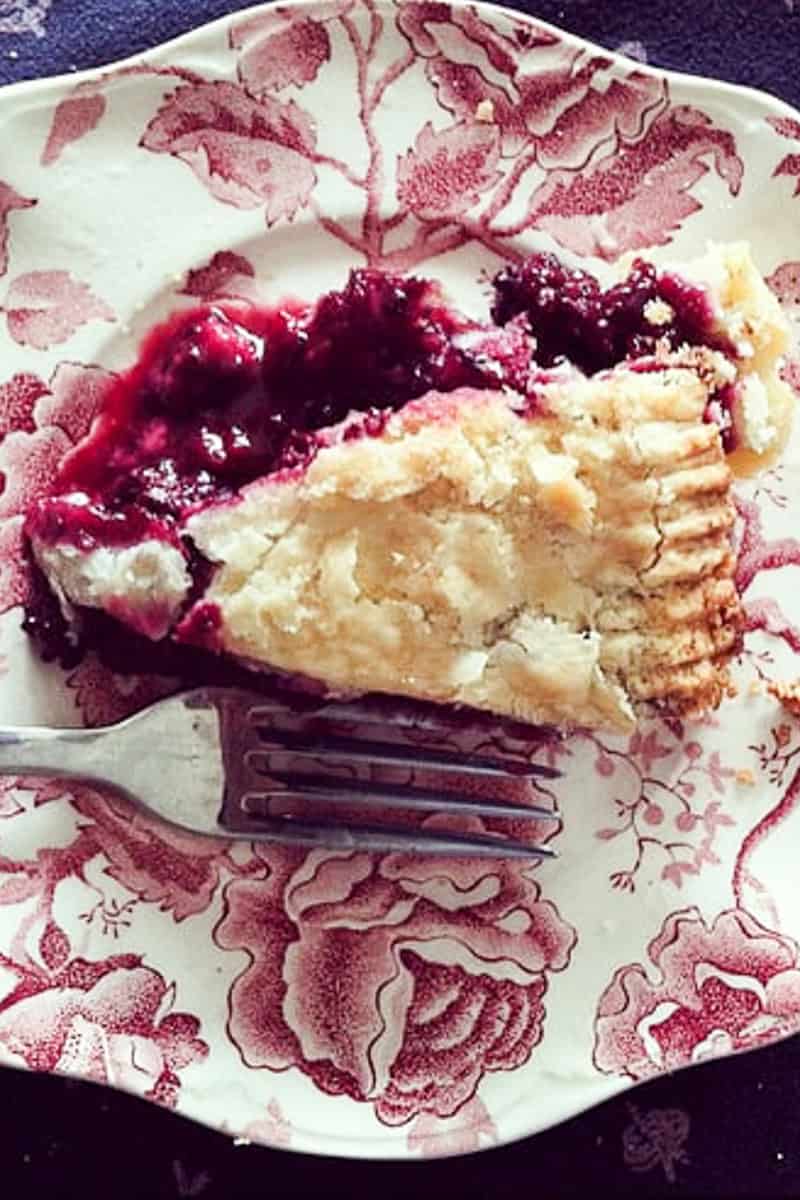
The Best Black Raspberry Pie
My aunt and uncle live on about 250 (give or take a few) acres in Vermont; about 10 acres (give or take a few) are 'developed' - by which I mean there's a house for living in, a pond for swimming in, lots of flowers, a now-defunct vegetable garden, and lots and lots of green grass. There are also a lot (and I mean a lot) of black raspberry bushes growing wild and unchecked out back of the house and in the hills.
The last time I visited, we ventured off past the back garden to pick black raspberries and later I made a black raspberry pie. We ate so much at dinner (Jeff's veggie chili and a sausage soup with quinoa, Julie's venison ravioli, Emily's grilled squash and herbs from the garden, and assorted other tidbits), it was difficult to manage dessert but we certainly made a good effort. This pie is very worth it. I know that black raspberries may not be readily available, so you can substitute red raspberries instead. In this version, I've gone gluten free, but you can certainly make a black raspberry pie with regular flour, and I've included some details lower down in this post.
Recipe Highlights
- Simple and sweet
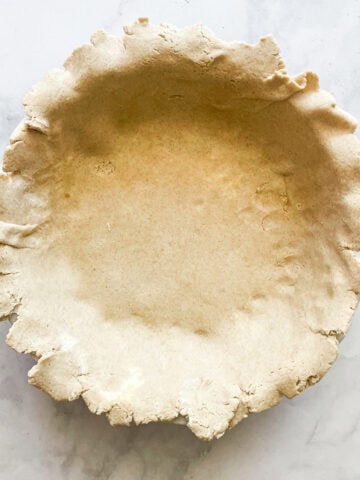
- That flaky crust (see the photo above)!
- Easily adapted to use other flours or berries
- Unique and beautiful
What Are Black Raspberries?
Black raspberries are a type of raspberry that resembles blackberries in color only - they are much sweeter than blackberries and are also a bit smaller in size. Black raspberries are native to North America and mostly grown wild - they are only farmed commercially in Oregon. While I've never seen them in California stores or farmers' markets, I'm ever hopeful. You may see black raspberries also called blackcaps, wild black raspberries, or thimbleberries.
What You'll Need
Here's a look at what you'll need to make this pie. The full ingredient amounts and detailed instructions are in the recipe card at the end of this post.
For the Crust
- Gluten free flour - I wrote this recipe using my gluten free flour blend, which makes a lovely, tender crust. You can try it with a gluten free flour blend of your choice.
- Butter - Use unsalted butter so that it doesn't compete with the sweetness of the pie filling, and make sure it is very cold.
- Granulated sugar - I like to add a little bit of sugar to my pie crusts when I make a sweet pie, as it makes the crust even more irresistible!
- Salt - I always use fine sea salt in my recipes!
- Ice water - Make sure to use ice water rather than just cold water - it helps the butter to solidify and holds the dough together, making for a crisper, more flaky crust once baked.
For the Filling
- Granulated sugar - If your berries are very sweet, you can cut the amount of sugar to ¾ cup, although a sweet filling for this pie is not unappreciated.
- Tapioca flour - Pie filling typically needs a binder to help the fruit gel together, and tapioca flour is one of my favorite ingredients to accomplish this. If needed, substitute half as much cornstarch for the tapioca.
- Cinnamon - A sprinkle of cinnamon adds a bit of warmth, you can omit it if you like.
- Black raspberries - Or use regular raspberries.
- Vanilla - For added depth of flavor, use pure vanilla extract.
Do I Have to Make This Gluten Free?
No - you can easily make this recipe using all-purpose flour in the crust. The rest of the ingredients, including what you need for the filling, will remain the same. Note that if you don't have tapioca flour you can substitute cornstarch, or use 4 tablespoons of all-purpose flour. In the crust, substitute 2 ½ cups of all-purpose flour for the gluten free flour blend, or do a combination of 1 ½ cups of all-purpose flour and 1 cup of whole wheat flour.
Recipe Tips & Tricks
A few easy tips to help you make this recipe are below:
- Rest the dough - Pie dough needs at least 30 minutes to chill before it's rolled out, so don't skip this step. You can also make the crust in advance and keep it in the fridge for up to 3 days, or freeze it for up to 3 months. Defrost the crust in the fridge before using.
- Make a lattice crust - For a pretty presentation, make a lattice crust to go atop the black raspberry pie. To make a lattice crust, roll out the dough for the top half of the pie, then cut it into strips. Place the strips of dough on the top of the pie filling, then layer them over and under one another to create a basket weave design.
- Do a crumble topping: Make half of the recipe for the pie crust, then do a simple crumble topping by whisking 1 cup flour with ½ cup sugar, then rub in ¼ cup of unsalted butter, and spread it evenly over the top of the pie.
- Let the pie sit - It's equally important to let the pie sit after it's fully baked. I prefer to let the pie cool completely to room temperature, for at least 2 hours, to allow the filling to set. Let's avoid a watery pie filling!
Serving Ideas
Serve slices of gluten free black raspberry pie warm and topped with big scoops of vanilla ice cream! You can also make homemade sweetened or unsweetened whipped cream to go alongside slices of pie. Pie makes the best summer dessert, preferably al fresco under the stars, or enjoy a slice cold for a morning snack.
How to Store & Reheat This Pie
Store any leftover pie in the pie pan, tightly covered with plastic or foil, in the fridge for up to 5 days. You can place the pie in the oven to reheat the entire pie, or place individual slices on a baking sheet and heat them at 350℉ until warm.
To freeze, wrap the unbaked pie tightly in a layer of plastic, then a layer of foil, and store it in the freezer for up to 3 months. Bake the pie, unwrapped, directly from the freezer, noting that it will take a bit longer to bake if it has been frozen. Or, freeze the baked pie, wrapped in plastic, for up to 3 months. Defrost in the fridge before eating or reheating.
More Pie Recipes

Gluten Free Black Raspberry Pie
Ingredients
Crust
- 2 ¾ cups gluten free flour (320 grams)
- 1 cup unsalted butter, cut into ½ inch cubes
- 2 teaspoonw granulated sugar
- 1 teaspoon fine sea salt
- 4-6 tablespoons ice water
Filling
- 1 cup granulated sugar
- 4 tablespoons tapioca flour
- ½ teaspoon cinnamon
- 4 cups black raspberries
- 1 teaspoon pure vanilla extract
Instructions
- Combine gluten free flour, sugar, and salt in a bowl. Cut in the butter using a pastry cutter, fork, or simply your hands. Mix and crumble together until the mixture resembles coarse meal. Add ice water 1 tablespoon at a time, tossing and stirring with a fork until it just holds together. Wrap in plastic wrap and let rest in the fridge for at least 30 minutes.
- To make the filling, whisk the sugar, tapioca flour, and cinnamon together, then add the black raspberries and vanilla and toss lightly to combine.
- Preheat the oven to 400℉. Divide the ball of dough in half, and roll out 1 dough disk on a floured work surface to about an 11-inch round. Transfer to a 9-inch pie dish. Trim the excess dough, leaving a ¾-inch overhang.
- Spoon the berry filling into the pie crust, and don't pour in the liquid at the bottom of the bowl.
- Roll out the other dough disc and fit it onto the pie dish. Press the edges of the dough together, then crimp with a fork (trim any excess or sort of tuck and press to incorporate into the rest of the dough). Make four slivers in the center of the pie.
- Place the pie on a baking sheet, place it in the oven, and bake in the middle of the oven for 25 minutes. Reduce the temperature to 350°F and bake the pie for 35-45 minutes more, or until the crust is golden and the filling is bubbly. Remove from the oven and cool on a rack until room temperature, at least two hours.
Notes
- Use ap flour: Substitute 2 ½ cups of all purpose flour for the gluten free flour if needed.
- Rest the dough - Pie dough needs at least 30 minutes to chill before it's rolled out, so don't skip this step. You can also make the crust in advance and keep it in the fridge for up to 3 days, or freeze it for up to 3 months. Defrost the crust in the fridge before using.
- Do a crumble topping: Make half of the recipe for the pie crust, then do a simple crumble topping by whisking 1 cup flour with ½ cup sugar, then rub in ¼ cup of unsalted butter, and spread it evenly over the top of the pie.
- Let the pie sit - It's equally important to let the pie sit after it's fully baked. I prefer to let the pie cool completely to room temperature, for at least 2 hours, to allow the filling to set. Let's avoid a watery pie filling!












Leslie says
Sounds like a heavenly place to have been, capped off with a heavenly dessert!
Jessica @ The Desert Abode says
I just wanted to say how delicious this looks! (And such a lovely photo, too). Summertime fruit pies are my favorite and I'm trying to crank out as many as I can before the season ends. Happy baking to you!
Anne Zimmerman says
What makes a black raspberry different than a regular raspberry? I'm not sure I've ever had/seen one.