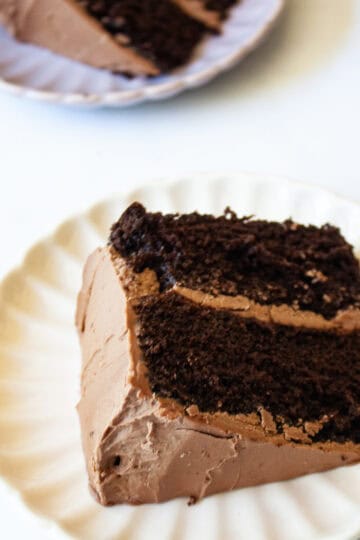
This beautiful gluten-free birthday cake features velvety vanilla cake layers filled and frosted with a fluffy chocolate buttercream frosting that makes every bite worthy of a celebration. You will not be able to tell that this is a gluten-free cake.

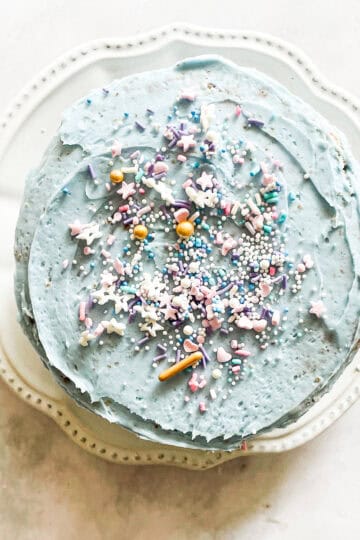
This fork-tender gluten-free birthday cake recipe is one of my favorite cakes to bake. It's perfect for a kid's birthday party (pile it with sprinkles), or cut big slices for the adults in the room. And when the cake is finished with an amazing chocolate buttercream, it approaches the pinnacle of celebration cakes!
Depending on the year, I decide on what kind of gluten free birthday cake suits me most. Sometimes it's an oat flour chocolate cake or a gluten free chocolate layer cake, a batch of oat flour chocolate cupcakes, or my favorite gluten free chocolate cake with peanut butter frosting. But nothing beats a classic vanilla cake paired with rich, bittersweet chocolate frosting! This recipe is one of the very best, and you absolutely won't be able to tell it's gluten-free.
Jump to:
Why I Love This Special Birthday Cake
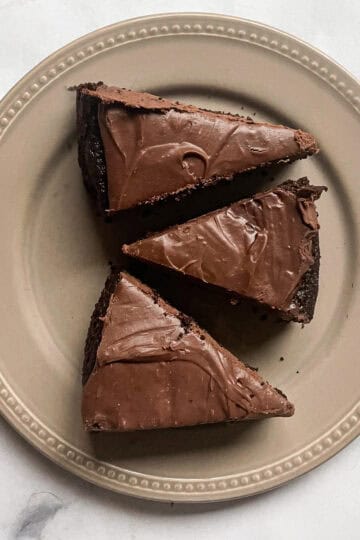
- The vanilla-chocolate combo. Chocolate cake is typically my preferred flavor of cake to eat and to serve, but there is a special place in my heart for the combination of sweet vanilla cake and chocolate frosting, particularly when they're turned into a birthday cake.
- Super tender crumb. For this recipe, I used my homemade gluten free flour blend. The crumb is velvety and rich. I've made this cake countless times for birthday parties, and it always receives rave reviews (and no one guesses it is gluten-free). You can also use a 1:1 gluten-free flour blend if you wish.
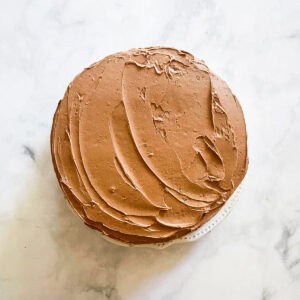
- Chocolate buttercream frosting. I love buttercream, and this chocolate buttercream frosting is so rich, smooth, and satisfying. Seriously THE BEST frosting you will eat.
- Versatile. You can make this as a layer cake, filled and frosted, or you can freeze a half and keep things simple with a one-layer cake. And, you can try any combination of fillings and frosting you like.

Ingredients Needed
Make sure to scroll down to my recipe card at the bottom of this post for the full ingredient amounts and instructions!
- Gluten free flour - I developed this recipe using my homemade gf flour blend, and it's perfect! You can use your preferred 1:1 gluten-free flour blend, but note that my blend does not contain xanthan gum.
- Baking powder - Check the expiration date on your carton of baking powder to make sure that it is fresh.
- Salt - I always use fine sea salt, and table salt also works.
- Butter - Use unsalted butter and bring it to room temperature before creaming it with the sugar.
- Granulated sugar - If you want a slightly less sweet cake, you can reduce the sugar by ⅓ cup.
- Eggs - Use large eggs.
- Vanilla- Use pure vanilla extract or vanilla bean paste.
- Milk - I prefer whole milk for richness, but 2% milk also works.
- Frosting - Unsalted butter, sifted powdered sugar, semisweet chocolate, and milk.
Variation Ideas
- Try other frostings - Look at this recipe as your base for all sorts of cake combinations, using the reliably good cake recipe and method as your jumping-off point. You can make chocolate ganache, lemon buttercream, cream cheese buttercream, strawberry or raspberry buttercream, and more.
- Other chocolate - I love semisweet chocolate to make the frosting, but for a sweeter frosting, you can try milk chocolate.
- Add jam - Make a batch of strawberry honey jam or strawberry rhubarb jam and spread a thin layer between each cake layer. You can keep the chocolate frosting or omit it.
- Add chocolate chips - Kids love adding mini chocolate chips to the batter before baking.
- Or make it funfetti - Like my gluten free funfetti cupcakes, but in cake form, add 1 cup of rainbow sprinkles to the batter.

How to Make a Gluten-Free Birthday Cake
Here's an overview in photos of how to make this delectable cake:

1. Make dry mix: Whisk together the flour, baking powder, and salt.

2. Cream butter: Beat together the butter and sugar.

3. Beat in eggs: Add eggs one and a time.

4. Finish batter: Add flour mix and milk.

5. Rest batter: Add batter to pans and rest.

6. Bake: Place cake in a 350°F oven and bake for 45 minutes, then cool.

7. Make frosting: Melt the chocolate and cool a bit.

8. Whip: Beat the butter with the powdered sugar, then add the chocolate and beat until fluffy.
Baking Tip: Serve the Cake at Room Temperature
I recommend bringing this cake to room temperature before serving, and if you have leftovers, it's best to treat them the same way. Gluten-free cakes can dry out a bit more quickly than their all-purpose flour counterparts, but if you are diligent about keeping them well covered/wrapped in the fridge, this will go a long way to extending their lifespan. Accordingly, letting the cake warm up a bit will soften the crumb and let you really taste how tender it is.

Tips for the Best Birthday Cake
- Rest the batter - All gluten-free batters benefit from resting the batter for at least 20 minutes before baking (or do this while the oven preheats). Place the cake batter in the pans, cover them loosely with plastic or a clean cloth, and rest for up to 30 minutes to hydrate the flour.
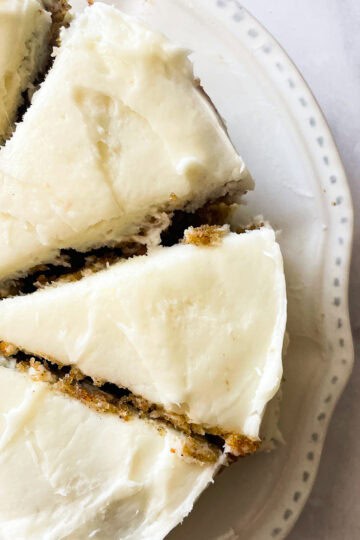
- Refrigerate the cake. When I make a layer cake, I bake the cake the day before and let it rest overnight in the fridge so it's very easy to frost and/or split the layers. The morning of the day I plan to serve it, I'll fill and frost the cake and let it rest again in the fridge until about an hour before serving to let the flavors fully develop and the frosting set. You can use the base cake recipe for any iteration of a layer cake along with your favorite fillings and frostings. Each layer also slices in half beautifully, so you can do a four-layer cake if you wish (like what's shown in the photos).
- Do a crumb coat! Even if you've refrigerated the cake, a crumb coat is always a good idea. What's a crumb coat? This means that you'll cover the filled cake with a thin layer of icing and let it sit in the fridge for about 5-10 minutes until it firms up. This will prevent unsightly cake crumbs from messing up the frosting. When the crumb coat frosting layer is firm, go ahead and finish frosting the cake.
- To make dairy-free - Use your favorite non-dairy butter and milk for the butter and whole milk.

Proper Storage
You have several options for storing this cake, including freezing it. Remember to let the cake sit out on the counter for at least 15 minutes before serving.
- Fridge - To store the cake in the fridge, cover it tightly and place it in the fridge for up to 5 days.
- Freezer (Frosted Cake) - To freeze a frosted cake, take the chilled cake and wrap it in a layer of plastic, then foil, and place it in the freezer for up to 3 months. Defrost the cake in the fridge before serving it.
- Freezer (Unfrosted Cake) - To freeze an unfrosted cake, wrap the unfrosted layers tightly in plastic and then in foil. Freeze the cake for up to 3 months. Thaw the cake completely in the fridge before frosting it.
More Gluten Free Cake Recipes

Happy baking! If you make this recipe, I'd love to know. Please leave a comment below, reach out with any questions, and tag me on Instagram @Cucina Nicolina ❤️
Recipe
Gluten-Free Birthday Cake
Ingredients
Cake
- 3 ½ cups gluten free flour (420 grams)
- 3 teaspoons baking powder
- 1 teaspoon fine sea salt
- 1 cup unsalted butter , at room temperature
- 2 cups granulated sugar
- 4 eggs , at room temperature
- 2 teaspoons pure vanilla extract
- 1 cup whole milk , at room temperature
Frosting
- 1 cup unsalted butter , at room temperature
- 6 ounces semisweet chocolate , melted and cooled slightly
- 3 cups powdered sugar , sifted
- 1-2 teaspoons whole milk , as needed
Instructions
Make Cake
- Butter 2 9-inch round cake pans and line them with a circle of parchment.
- In a small bowl, whisk together the 3 ½ cups gluten free flour , 3 teaspoons baking powder , and 1 teaspoon fine sea salt.
- In a large bowl and using an electric mixer on medium speed, cream the 1 cup unsalted butter, scraping down the sides of the bowl as necessary, until the butter is lighter in color, about 45 seconds. Then add the 2 cups granulated sugar in a steady stream and scrape down the bowl again. Continue to mix on medium speed until the mixture is very light in color and texture, about 4 to 5 minutes.
- Add the 4 eggs one at a time, then beat very well for about 2 minutes. Beat in the 2 teaspoons pure vanilla extract.
- With the mixer on low, add the flour mixture in two doses, alternating with the 1 cup whole milk. Scrape down the sides of the bowl in between additions.
- Preheat the oven to 350°F. Pour the batter into the prepared pans, smoothing the tops. Rest the batter while the oven heats, then place the cake in the oven and bake for 35-45 minutes, or until a toothpick inserted in the center comes out clean. Check after 35 minutes; you want the cake to lightly spring back in the center when pressed.
- Remove cake rounds from the oven and set on a rack to cool for 10 minutes. Run a butter knife around the side of the pan to loosen the cake, then turn out onto the rack to finish cooling completely.
Make Frosting and Assemble
- In a large bowl, using an electric mixer, whip the 1 cup unsalted butter. Add the slightly cooled 6 ounces semisweet chocolate and mix to combine. Add 1 tablespoon 1-2 teaspoons whole milk. Add 1 cup powdered sugar and mix. Add more milk or sugar as desired for consistency.
- To assemble the cake, place one cake layer on a serving plate. (I like to chill my layers in the fridge, well wrapped for a few hours or up to overnight.) Spread one layer with about one-third of the frosting, then top with the other cake layer. Use the remaining frosting to cover the cake. Alternatively, split each layer in half and portion the frosting accordingly to fill each layer.
- Cake should be served at room temperature-cool room temperature. It will last up to 5 days in the fridge.
Notes
- Rest the batter - All gluten-free batters benefit from resting the batter for at least 20 minutes before baking (or do this while the oven preheats). Place the cake batter in the pans, cover them loosely with plastic or a clean cloth, and rest for up to 30 minutes to hydrate the flour.
- Refrigerate the cake. When I make a layer cake, I bake the cake the day before and let it rest overnight in the fridge so it's very easy to frost and/or split the layers. The morning of the day I plan to serve it, I'll fill and frost the cake and let it rest again in the fridge until about an hour before serving to let the flavors fully develop and the frosting set. You can use the base cake recipe for any iteration of a layer cake along with your favorite fillings and frostings. Each layer also slices in half beautifully, so you can do a four-layer cake if you wish (like what's shown in the photos).
- Do a crumb coat! Even if you've refrigerated the cake, a crumb coat is always a good idea. What's a crumb coat? This means that you'll cover the filled cake with a thin layer of icing and let it sit in the fridge for about 5-10 minutes until it firms up. This will prevent unsightly cake crumbs from messing up the frosting. When the crumb coat frosting layer is firm, go ahead and finish frosting the cake.
- To make dairy-free - Use your favorite non-dairy butter and milk for the butter and whole milk.
Helen says
Always delicious…. Nice combo of flours. Comes together perfectly & gluten free as well!