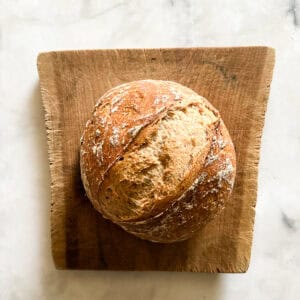
This crusty gluten-free no-knead bread bakes up perfectly every time and is just begging for a bit of salted butter. Four simple ingredients come together to create a crackly, lofty loaf that will rival any wheat-based bread!

Jim Lahey's quintessential no knead bread recipe has been my bread recipe for at least a decade, and it produces a reliable, crackly-crusted, sourdough-like loaf every time. Turning it gluten-free has been a goal of mine for a while, and I'm so thrilled to share this wonderful recipe!
I made a few small changes to Leahy's recipe: I added a bit more yeast, used gluten-free bread flour, and baked it a tad longer than when I use regular flour. You'll be amazed at how "bready" this loaf bakes up, with no gumminess or soggy crust, thanks to the Dutch oven. Skip the grocery store bread and make it yourself - I promise you won't regret it!
I love this bread with bowls of carrot cauliflower soup, butternut squash soup, or vegetarian minestrone soup!
Jump to:
Why This Gluten-Free Bread Works
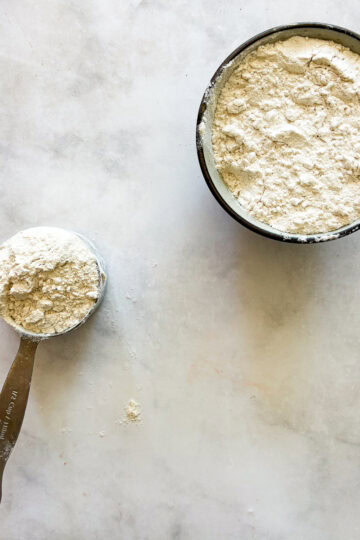
Using a gluten free bread flour, like my homemade gluten free bread flour, or a purchased blend like King Arthur Flour's gluten-free bread flour, is this recipe's secret superpower. No extra expensive ingredients are needed to stock the pantry, just a simple gluten free flour mix, yeast, and salt.
Baking the dough in a Dutch oven yields a loaf of bread with a crisp crust and tender, floofy insides, just like "real' bread! And, because of the long rise time, you can set the bowl of dough in a warm place for up to 24 hours and forget about it until you're ready to bake. Low-maintenance bread is my kind of bread!
This Bread is SO Easy and Delicious
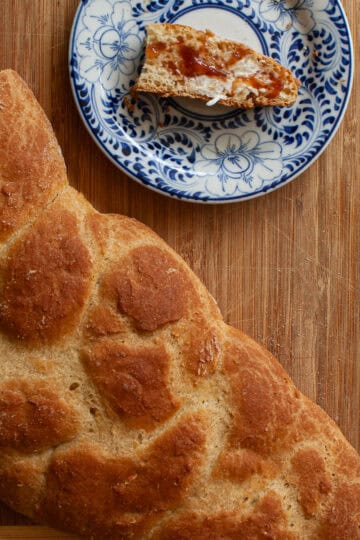
The smell of bread baking is always so homey and delicious! Toast slices and serve them with butter and blackberry jam or strawberry honey jam at breakfast, or dip them into bowls of gluten free chili for lunch. Here's why I love this recipe:
- A great homemade sourdough alternative. While I love to bake with single-origin flours, I leave the intricacies of gluten-free bread baking from scratch to the professionals! This gluten free version of no-knead bread is my compromise that's actually not a compromise! It has the flavor of homemade sourdough but without the fuss.
- Novice-friendly. If you're new to gluten-free bread baking, this is the recipe for you! I promise that this is such an easy bread recipe that anyone can make it. It's so hard to mess up this method, which is another reason it is perfect for gluten-free beginners! Just rise, form, and bake.
- So much better than store-bought. I don't have a dedicated gluten-free bakery in my town, and the grocery stores don't stock crusty loaves of fresh gluten-free bread. Thank goodness for this recipe, though, because now I can bake fresh bread anytime I want it.

What You'll Need
Four basic ingredients (and that includes water!) make up this beautiful loaf. Make sure to scroll down to my recipe card at the bottom of this post for the full ingredient amounts and instructions!
- Gluten-free bread flour - I developed this recipe using my homemade bread flour mix, and have also made it with King Arthur Bread Flour, which is certified gluten-free. Feel free to try another gluten-free bread flour mix, although I can't guarantee it will turn out exactly like my version.
- Yeast - You can use instant dry yeast or fast-acting instant dry yeast, with no need to activate it first.
- Salt - I always use fine sea salt or table salt.
- Water - Make sure the water is warmer than room temperature to help activate the yeast.
A Few Variations on a Theme
- More salt - I add about 1 teaspoon of salt for my bread, and if you want a bit more contrast, experiment with the amount of added salt (try 1 ½ teaspoons of salt, for example). Or, sprinkle the top of the loaf with flaky salt.
- Make it herb-y - Add fresh or dried herbs to the dough, such as chopped fresh rosemary, oregano, or thyme.
- Seeds - I love adding sesame or poppy seeds! You can work them into the dough or roll the formed dough in 1-2 tablespoons of seeds before baking it.

Step-by-Step Instructions
I've included a good amount of photos here so you can see how the gluten-free dough should look at every stage.

1. Make dough: Mix all of the ingredients in a large bowl, cover, and let rise for 18 hours.

2. Time to work the dough: This is how the dough will look after the rise. It won't be as bubbly as a loaf made with wheat flour.

3. Form the loaf: Knead the dough 6 times, then form it into a loaf. Cover and let rise for 1 hour.

4. Score: Slash the top of the loaf with a knife, then place it in a hot Dutch oven. Bake at 450F for 40 minutes covered.

5. Uncover: This is what the bread will look like after baking with the lid on. Now take the lid off and bake for another 20 minutes.

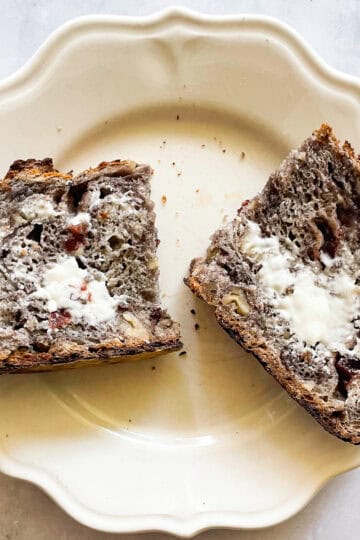
6. Cool: When the bread is done, cool for at least 2 hours to set the crumb before cutting.

Gluten Free Bread-Making Tips
- Let it rise. Lahey advises letting the dough rise for 12-18 hours, preferably 18 hours. I typically let my loaf rise for a minimum of 16 hours, and you can let it go for up to 2 days. The longer rise time will deepen its flavor and make for a better-baked loaf.
- Place in the fridge. If you do have the time and want to let the dough rest a bit longer, after the initial long rise at room temperature, cover the bowl of dough with plastic and place it in the fridge for up to 3 days. The day you plan to bake, remove it from the fridge, follow the recipe instructions for the brief kneading process, and then let the bread sit and warm up at room temperature for at least 2 hours.
- Keep in a warm place. Try to let the dough rise in a warm place! This is not always totally possible for me because our house tends to be on the cooler side, especially in the winter. I keep the dough t near the oven, which is a warmer spot. If your house is also on the cooler side, you can place the bowl in the sun, or add a few hours of rise time to allow the dough to rise more.
- Start with the Dutch oven in the oven. Starting with a hot Dutch oven helps create that lovely crackly crust. So when you are preheating the oven, let the Dutch oven heat as well.
- Bake on high heat. I preheat my oven at 500°F and then lower it to 450°F for the actual baking.
- How do I know my bread is done? Baking gluten-free bread is obviously a bit different than baking regular bread. For one, it will take longer. After a lot of experience baking bread, you'll start to know when your bread is done by how dark the outside crust has become. I find my sweet spot for gluten-free no-knead bread is 40 minutes in the Dutch oven with the lid on, then an additional 20-25 minutes uncovered, but times may vary depending on your oven. If you want to make absolutely sure the bread is done, use an instant-read thermometer. The loaf is fully cooked when it reaches 209-210°F (98-99°C).
- Cool the loaf completely. It's so hard not to tear into a warm, freshly baked loaf of bread as soon as it comes out of the oven, but try to wait at least 2 hours. This allows the starches to set and solidify (if you've ever been disappointed by a gummy crumb, chances are the bread didn't rest long enough). This is extra important when baking gluten-free bread.

Proper Storage
- Counter - Wrap any leftovers from the loaf in a clean kitchen towel or place it in a bread bag or paper bag and keep it on the counter overnight, then slice and freeze the slices.
- Freezer - You can freeze the entire loaf by placing it in a sealable freezer-safe bag, or slice it up and store slices in a freezer-safe bag. Whatever you do, make sure to let the bread cool before preparing it for the freezer. Store in the freezer for up to 2 months. You can let the bread defrost in the fridge or on the counter for a few minutes, or warm it from frozen in the toaster, toaster oven, or oven.
Happy baking! If you make this gluten free no knread bread recipe, I'd love to know. Please leave a comment below, reach out with any questions, and tag me on Instagram @Cucina Nicolina ❤️
Recipe
Gluten Free No Knead Bread
Ingredients
- 4 cups gluten free bread flour I used King Arthur Gluten Free Bread flour
- ½ teaspoon instant yeast
- 1-1½ teaspoons fine sea salt
- 2 ¾ cups warm water plus a few more tablespoons if needed
Instructions
- In a large bowl, stir together the 4 cups gluten free bread flour, ½ teaspoon instant yeast, and 1-1½ teaspoons fine sea salt. Add 2 ¾ cups warm water and mix well to incorporate all of the flour. I often find I need a little more water to create the dough, so add more water 1 tablespoon at a time if needed. Stir everything together to form a dough.
- Cover the bowl with a clean kitchen towel or plastic wrap and place it in a warm place. Let the dough rise for 16-18 hours, or longer.
- When ready to bake, uncover the dough. Place a Dutch oven in the oven and preheat the oven to 500℉.
- Lightly flour a large cutting board, and keep the flour handy. Dump and scrape the dough onto the cutting board and adding a little more flour if necessary so that it's not too sticky to handle, knead and roll the dough for about 6 turns. Roll the dough into a ball and place it seam-side down on the cutting board, lightly flour it, and cover with a towel. Let rise for 1 hour.
- Very carefully add the dough to the hot dutch oven. (You may score the top before or after placing it into the dutch oven if you like.) Add the lid and lower the temperature to 450℉. Bake for 40 minutes covered, then remove the lid and bake the bread for 20-30 minutes until golden brown.
- Remove the bread from the dutch oven and let it cool on a rack for at least 1 hour before slicing it.
Notes
- Let it rise. Lahey advises letting the dough rise for 12-18 hours, preferably 18 hours. I typically let my loaf rise for a minimum of 16 hours, and you can let it go for up to 2 days. The longer rise time will deepen its flavor and make for a better-baked loaf.
- Place in the fridge. If you do have the time and want to let the dough rest a bit longer, after the initial long rise at room temperature, cover the bowl of dough with plastic and place it in the fridge for up to 3 days. The day you plan to bake, remove it from the fridge, follow the recipe instructions for the brief kneading process, and then let the bread sit and warm up at room temperature for at least 2 hours.
- Keep in a warm place. Try to let the dough rise in a warm place! This is not always totally possible for me because our house tends to be on the cooler side, especially in the winter. I keep the dough t near the oven, which is a warmer spot. If your house is also on the cooler side, you can place the bowl in the sun, or add a few hours of rise time to allow the dough to rise more.
- Start with the Dutch oven in the oven. Starting with a hot Dutch oven helps create that lovely crackly crust. So when you are preheating the oven, let the Dutch oven heat as well.
- Bake on high heat. I preheat my oven at 500°F and then lower it to 450°F for the actual baking.
- How do I know my bread is done? Baking gluten-free bread is obviously a bit different than baking regular bread. For one, it will take longer. After a lot of experience baking bread, you'll start to know when your bread is done by how dark the outside crust has become. I find my sweet spot for gluten-free no-knead bread is 40 minutes in the Dutch oven with the lid on, then an additional 20-25 minutes uncovered, but times may vary depending on your oven. If you want to make absolutely sure the bread is done, use an instant-read thermometer. The loaf is fully cooked when it reaches 209-210°F (98-99°C).
- Cool the loaf completely. It's so hard not to tear into a warm, freshly baked loaf of bread as soon as it comes out of the oven, but try to wait at least 2 hours. This allows the starches to set and solidify (if you've ever been disappointed by a gummy crumb, chances are the bread didn't rest long enough). This is extra important when baking gluten-free bread.

I'd love to hear from you! Please leave me a note.