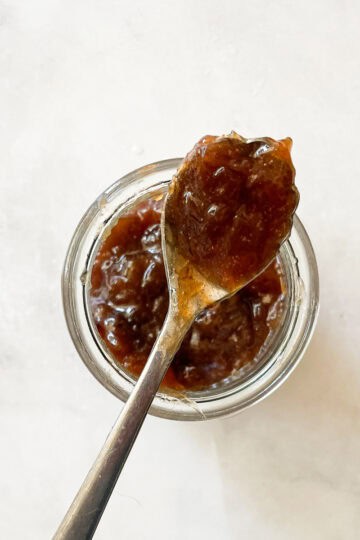
This blackberry jam recipe (no pectin) leans hard into the natural sweetness of blackberries, meaning that it's not so sweet that you don't taste the gorgeous, juicy berry flavor in every spoonful. Made with just 3 ingredients.
 is easy to make and great for canning or just to eat now with toast!")
Here's my favorite recipe for a pectin-free blackberry jam that comes together in an afternoon. I love canning my jam to capture late summer's sunshine in jars I can crack open in the middle of January, but did you know you can also make freezer jam (see my strawberry rhubarb freezer jam post for tips on that)? This jam is crammed with ripe, juicy blackberries that you can truly taste in each bite.
I'm a minimalist at heart, so I love that blackberry jam does not need added pectin. Blackberries on their own are naturally high in pectin -- this matters because pectin is what helps jam to set properly -- so I can keep my jam ingredients to the basics. All I ever use in my blackberry jam are ripe berries, sugar for sweetness, and lemon juice for freshness.
For a trip down memory lane, check out my NPR Kitchen Window article about all of the blackberry and blackberry jam I canned for my wedding party a million years ago ...
Jump to:
Homemade Jam Is Absolutely the Best
It is! I love that I can adjust the sugar content, use whatever fruit is in season, and, perhaps the most important of all, it makes my whole house smell amazing while it's simmering on the stove! Blackberry jam is my personal favorite of all the jams, and lining up my just-canned jars makes me feel like the richest person in the world. Here are some more high points:
- Delicious! OK, OK. Most homemade jams (think strawberry honey jam or strawberry & rhubarb jam) are super yummy without qualification. But to me, there is something so special about blackberry jam - it's sweet, but not too, and there's just the subtlest hint of tartness underlying the berry flavor. Uniquely beautiful, too!
- Thrifty. A jar of blackberry jam is pricey, there's no way around it. But when you make it yourself, you will not only save money, but it tastes better, too.
- No preservatives. Again, store-bought jam might contain extra ingredients to preserve its freshness. Let's skip that and DIY it for a simpler jam!
 is easy to make and great for canning or just to eat now with toast!")
Ingredients Needed
Did I mention easy? Yep, this jam only needs 3 basic ingredients, which I've outlined below. Make sure to scroll down to my recipe card at the bottom of this post for the full ingredient amounts and instructions.
- Blackberries - Fresh or frozen blackberries are just fine here, just make sure that they are ripe and sweet!
- Sugar - Granulated sugar is my go-to here.
- Lemon juice - I like adding a bit of lemon juice to my jam because it serves the dual purpose of helping to keep the jam fresher longer, and it helps to activate the natural pectin in the blackberries (this thickens the jam).
Jam Variations
- Honey-sweetened - Use half honey and half sugar, or all honey (or maple syrup for a vegan option).
- Add vanilla - Add 1 teaspoon of pure vanilla extract or vanilla bean paste.
- A pinch of salt - A big pinch of fine sea salt stirred into the jam pot will accentuate its sweetness.
- Other berries - Make a mixed berry jam by stirring in raspberries or blueberries along with the blackberries.
 is easy to make and great for canning or just to eat now with toast!")
How to Make Homemade Blackberry Jam
Here's an overview in photos of how to make this beautiful jam:
 is easy to make and great for canning or just to eat now with toast!")
1. Add ingredients to a pot: Place the blackberries, sugar, and lemon juice in a pot and stir to combine.
 is easy to make and great for canning or just to eat now with toast!")
2. Cook: Bring the ingredients to a boil over medium heat, then reduce the heat and simmer until thick.
Jam Tips
- Add more sugar. I prefer not to oversweeten my jams (see my low sugar strawberry jam for tips) so that I can really taste that luscious fruit flavor. If you like a bit of a sweeter jam, add 1 more cup of sugar.
- Use ripe blackberries - always! This will help the jam to turn out nice and sweet without a ton of added sugar. Blackberries are ready and ripe when they are deeply purple black, soft, and can be plucked easily from the bushes.
- Try a thermometer. To ensure the jam reaches its proper setting point, insert an instant-read thermometer. When it reads 220°F, the jam has reached the setting point.
- Use a large pot. Make sure there is plenty of room in the pot for the jam to reach the rolling boil; at this point, I like to skim off the foam.
- Skimming the foam. About that - skimming off any foam that rises to the surface during the boil (use a slotted spoon) will create a clearer jam.
- Stir often. Don't let that jam burn! Not only will it ruin your pot, but you'll be so sad to have wasted all the gorgeous fruit. Stirring frequently ensures that the jam doesn't stick and burn on the bottom of the pot.
- Try frozen fruit. Confession: Some years, I just don't have time to make jam as soon as the berries are ripe. We stash them in the freezer, and then I cook them directly from frozen when I have a free afternoon.
- The plate test. Place a plate in the freezer to chill while the jam cooks. When the jam coats the back of a wooden spoon, drizzle a little jam on the cold plate. Drag a spoon through it; if the jam "wrinkles" and doesn't run, it's set and ready to take off the heat. If it's still liquidy, keep cooking it and try again in a few minutes.
 is easy to make and great for canning or just to eat now with toast!")
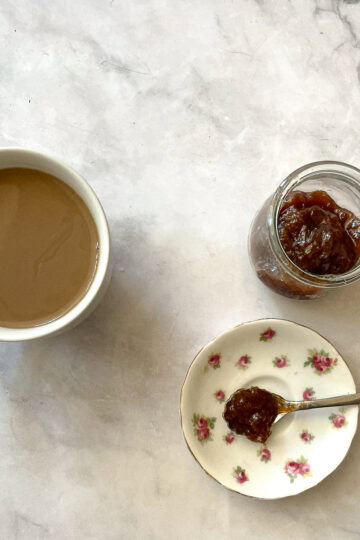
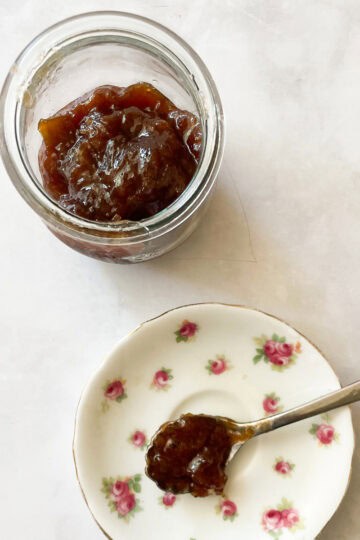
Ways to Use it
When you're not scooping up jam with a spoon and enjoying it straight from the jar, it's also lovely on cake, ice cream, and of course, toast.
- Cake: Finish a gluten free butter cake with jam or add spoonfuls to slices of gluten free coconut loaf cake or a coconut loaf cake. Or swap blackberry for rhubarb jam in my gluten free rhubarb cream cake recipe. And of course, it's perfect in my gluten free blackberry jam cake.
- Scones: I love jam and whipped cream with oat flour scones or gluten free lemon scones.
- On bread: Try jam with toast made from easy dutch oven bread or leftover porridge bread.
 is easy to make and great for canning or just to eat now with toast!")
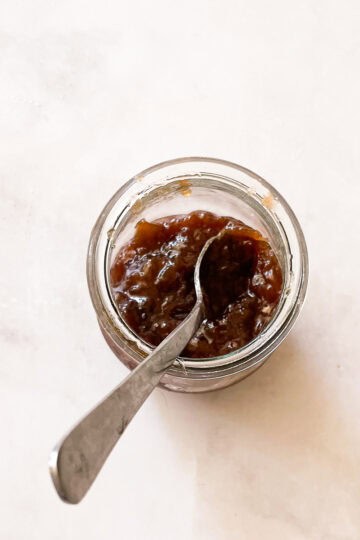
How to Store Jam
- Preserve it - If you wish to can your jam (I always do this so we can enjoy it all year round), use the USDA's home canning guide to can your jam safely.
- Fridge - If you wish, store jam in the fridge for up to 2 weeks in sealable glass jars, sealable bags, or sealable containers.
- Freezer - Ladle the hot jam into jars, leaving ½ inch of space at the top, add the lid and tighten. Cool the jam to room temperature, then place the jars in the freezer for up to 1 year. The jars will not break in the freezer so long as you leave enough space at the top.
More Blackberry Recipes
Happy baking! If you make this recipe, I'd love to know. Please leave a comment below, reach out with any questions, and tag me on Instagram @Cucina Nicolina ❤️
Recipe

Blackberry Jam Recipe (No Pectin)
Ingredients
- 5 cups blackberries (about 24 ounces)
- 2 cups granulated sugar, add more if your berries are very tart
- 1 tablespoon lemon juice
Instructions
- Place a small plate in the freezer. In a large, heavy-bottomed pot, combine 5 cups blackberries, 2 cups granulated sugar, and 1 tablespoon lemon juice. Using a wooden spoon, mash and crush the berries a bit if you like, then cook on high heat for 5 minutes. Reduce to low, skim off any foam that comes to the top, and continue simmering until the mixture thickens, at least 20 minutes and longer if needed.
- Check for doneness by using a thermometer; the temperature should read 220°F. Or, remove the plate from the freezer, place a spoonful of jam on the plate, and drag the spoon through it. If the jam wrinkles, it's done. If it's still loose, keep cooking a bit longer.
- Remove from heat and pour into sterile glass jars or containers. Jam will thicken as it cools. If canning, proceed with your preserving method, or let the jam cool on the counter and then store in the refrigerator.
Notes
CN's Jam Tips
- Add more sugar. I prefer not to oversweeten my jams (see my low sugar strawberry jam for tips) so that I can really taste that luscious fruit flavor. If you like a bit of a sweeter jam, add 1 more cup of sugar.
- Use ripe blackberries - always! This will help the jam to turn out nice and sweet without a ton of added sugar. Blackberries are ready and ripe when they are deeply purple black, soft, and can be plucked easily from the bushes.
- Try a thermometer. To ensure the jam reaches its proper setting point, insert an instant-read thermometer. When it reads 220°F, the jam has reached the setting point.
- Use a large pot. Make sure there is plenty of room in the pot for the jam to reach the rolling boil; at this point, I like to skim off the foam.
- Skimming the foam. About that - skimming off any foam that rises to the surface during the boil (use a slotted spoon) will create a clearer jam.
- Stir often. Don't let that jam burn! Not only will it ruin your pot, but you'll be so sad to have wasted all the gorgeous fruit. Stirring frequently ensures that the jam doesn't stick and burn on the bottom of the pot.
- Try frozen fruit. Confession: Some years, I just don't have time to make jam as soon as the berries are ripe. We stash them in the freezer, and then I cook them directly from frozen when I have a free afternoon.
- The plate test. Place a plate in the freezer to chill while the jam cooks. When the jam coats the back of a wooden spoon, drizzle a little jam on the cold plate. Drag a spoon through it; if the jam "wrinkles" and doesn't run, it's set and ready to take off the heat. If it's still liquidy, keep cooking it and try again in a few minutes.
helen says
Lovely post.....a nice and loyal tribute to the recently departed Seamus Heaney..... you always provide a spot on description of northern California. Love it!
Marlene Dotterer says
I LOVE pie. There a few kinds I can do without, such as mincemeat, but in general, PIE is the most amazing stuff. Yours looks awesome. I hope wee fennel enjoys it too. Such good, real food!