A 2-ingredient simple chocolate icing that's made in just a few minutes. Perfect on cakes, cupcakes, tarts, and more.

A simple, luxuriant chocolate icing is a staple recipe, and I love how easy this one is to make. Just melt together semisweet chocolate and butter and then smooth it over the top of any cake you fancy, from a gluten free banana cake with chocolate icing, a flourless chocolate cake, a teff chocolate cake, or a batch of oat flour chocolate cupcakes. Or use it to fill and frost for a gluten free vanilla buttermilk cake or gluten-free birthday cake. There are no wrong answers here!
Jump to:
Why I Love This Simple Icing
I LOVE a classic chocolate buttercream frosting, but sometimes I want something a bit easier to make and with a deeper, richer chocolate taste. Enter simple chocolate icing. With just two ingredients (chocolate and butter) needed, plus 10 minutes or less of cooking time, you'll have a versatile and delicious topping ready fast. Here are my top reasons why I make this icing again and again:
- Versatile. Yes, this is the best, most versatile icing! I've included some serving options lower down, but I find that it goes with many flavors of cakes, from a simple gluten free busy day cake to a gluten free chocolate layer cake.
- Great when you're short on time. I admit that there are days when I decide about an hour or so before school pickup that I want to bake a cake. I don't have much time to bother with fussy frosting, and I always make this quick icing when I'm pressed for time.
- But it's also delicious. Not only is this a quick, simple, and versatile icing it is unqualifiably delicious! The buttery undertone perfectly pairs with the rich chocolate to make a smooth and spoonable treat.

Ingredients Needed
Like I mentioned, you need just two ingredients for this foolproof icing! Make sure to scroll down to my recipe card at the bottom of this post for the full ingredient amounts and instructions!
- Butter - Use high-quality, unsalted butter if possible, since there are so few ingredients in this icing.
- Chocolate - You can use chocolate chips or chop up a chocolate bar. I mostly use semisweet chocolate.
Variations to Try
- Use salted butter - For a sweet-salty flavor, use salted butter in place of the unsalted, or add a big pinch of salt.
- Add vanilla extract - Stir in ½-1 teaspoon of pure vanilla extract to the icing after the butter and chocolate have melted.
- Make it vegan - Easily make this recipe vegan-friendly by swapping non-dairy butter for the butter.
- Other chocolate - I love the less-sweet flavor of semisweet chocolate, but you can use any variety of chocolate you like. For a richer, sweeter icing, use milk chocolate.
How to Make Simple Chocolate Icing
Here's an overview in photos of how to make this easy recipe:

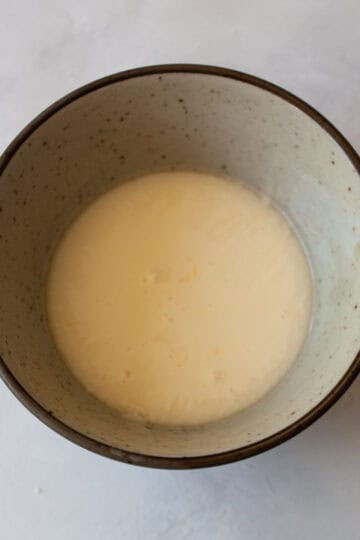
1. Combine ingredients: Place the butter and chocolate in a heatproof bowl over simmering water.
2. Melt: Heat the chocolate and butter until melted, then stir them together until smooth.
Tips
- Make sure the chocolate is fully melted. This is meant to be a luxuriously smooth icing, so you NEED to ensure that the chocolate is totally melted! If you pull the bowl off the heat and notice there are some lumps of unmelted chocolate, return it to the stove and heat it a little longer so that it's completely smooth.
- Cool it a bit. The icing will be quite warm to hot when you take it off the stove. I like to let it cool for about 10 minutes before icing my cake.
- Add to a cooled cake. In that same vein, you'll want to make sure your cake is completely cooled before adding the icing. If the cake is warm, it may melt the icing.
- It will firm as it cools. If the icing seems a bit goopy or liquidy when you add it to the cake, don't worry! It will firm and set up as it cools.
- Double up. Make more icing by doubling or tripling the quantities if you need a lot.

Ways to Use It
- On cake: Almost any cake you can think of will be great with this chocolate icing. Try it on a gluten free chocolate stout cake rather than the cream cheese frosting, use it to dress up gluten-free gingerbread, a gluten free pumpkin sheet cake, or a gluten free chocolate zucchini cake.
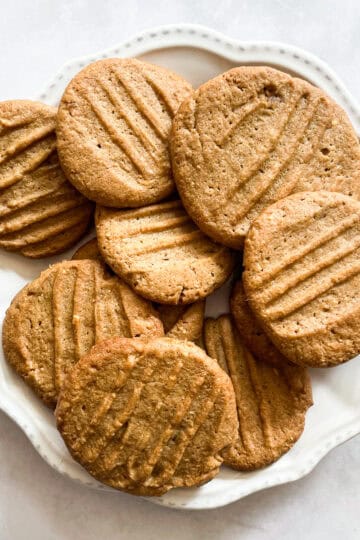
- With cookies: Drizzle icing on oat flour chocolate chip cookies or gluten free shortbread or use it to add a hint of chocolate to oat flour peanut butter cookies.
- At breakfast: Add a little chocolate icing to oat flour waffles or oat flour pancakes.

Can I Make It In Advance?
Yes, you can make this icing in advance, although it's so simple to make, I usually just make it right when I want to use it. A bonus to using it right away is that the icing will be nice and pliable and will spread easily. But if you wish to make the icing ahead of time, follow the storage instructions below.
How to Store
If you have leftover icing or want to make it ahead of time, cool the icing slightly, then transfer it to an airtight container and store it in the fridge for up to 3 days. The icing will be firm after being refrigerated, so let it sit on the counter to warm up before you spread it, or briefly heat it in the microwave for 10-15 seconds until it reaches a spreadable consistency.
More Easy Dessert Recipes

Happy baking! If you make this recipe, I'd love to know. Please leave a comment below, reach out with any questions, and tag me on Instagram @Cucina Nicolina ❤️
Recipe

Simple Chocolate Icing
Ingredients
- ½ cup unsalted butter
- 3 ounces semisweet chocolate as chips or chopped chocolate
Instructions
- Cut up the butter and place it with the chocolate in a heatproof bowl set over simmering water. Cook, stirring if needed, until the ½ cup unsalted butter and 3 ounces semisweet chocolate are fully melted.
- Remove from the heat and stir until very smooth, then use to frost your favorite cake or cupcakes! The icing will firm up a bit as it cools.
Notes
- Make sure the chocolate is all melted. This is a luxuriously smooth icing so you NEED to ensure that the chocolate it totally melted! If you pull the bowl off the heat and notice there are some lumps of unmelted chocolate, return it to the stove and heat it a little longer so that it's completely smooth.
- Cool it a bit. The icing will be quite warm to hot when you take it off the stove. I like to let it cool for about 10 minutes before icing my cake.
- Add to a cooled cake. In that same vein, you'll want to make sure your cake is completely cooled before adding the icing. If the cake is warm, it may melt the icing.
- It will firm as it cools. If the icing seems a bit goopy or liquidy when you add it to the cake, don't worry! It will firm and set up as it cools.


I'd love to hear from you! Please leave me a note.