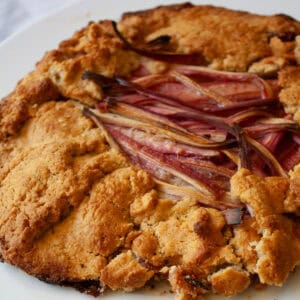
A tender, flaky gluten-free pastry wraps around sweet-tart slices of rhubarb in this rustic gluten free rhubarb galette. You'll love serving this free-form dessert throughout rhubarb season, especially with ice cream!

This pretty gluten free rhubarb galette is my answer to "what shall I do with all this rhubarb?" when I don't feel like embarking on a pie project. Galettes, a French pastry that is meant to be a bit rustic, are a lovely option when you want to make an easy, quick dessert.
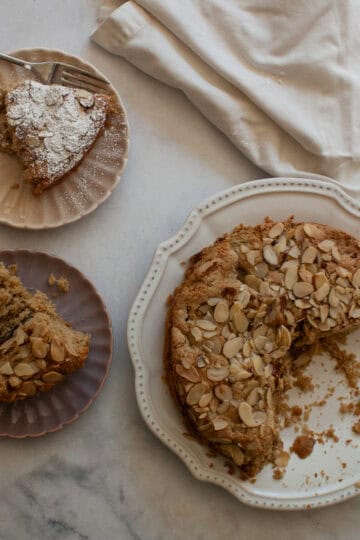
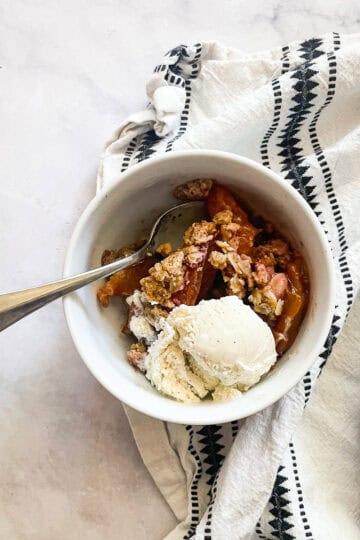
I used my gluten free all butter pie dough recipe and wrapped it around an orange zest-spiked, sweet-tart rhubarb filling. (You can also use an oat flour pie crust if you prefer.) The galette bakes up beautifully flaky and endearingly messy, and it's delicious served warm with a scoop of vanilla ice cream.
Don't forget to check out my easy rhubarb recipes post for more rhubarb recipes, or make my whole wheat rhubarb galette if you don't need to keep gluten-free.
Jump to:
What You'll Love About This Gluten Free Galette
- Easier than a pie. No blind baking, no double crust, just a 9-inch pastry folded around a filling. And unlike a pie, galettes don't need up to an hour in the oven, nor do you have to change the temperature during baking.
- You'll taste the rhubarb. While there's enough sugar here that the finished galette is not too tart, I intentionally did not oversugar the rhubarb so that its unique flavor is not overwhelmed by sweetness. You will be able to taste it (this is a good thing)!
- Makes the best of seasonal rhubarb. If you're lucky enough to have a rhubarb plant in the garden and have made your fill of gluten free rhubarb bread or gluten free rhubarb muffins, a galette is a beautiful way to continue to showcase this seasonal treat.

Ingredients Needed
Here's an overview of what you'll need to make a gluten free rhubarb galette. Make sure to scroll down to my recipe card at the bottom of this post for the full ingredient amounts and instructions!
- Egg yolk - From a large or medium egg.
- Ice water - A tip is to make the ice water before you assemble the rest of the crust so that it's very cold when it comes time to use it.
- Gluten free flour - Any 1:1 gluten-free flour blend will work here. I used my homemade gluten free flour blend.
- Granulated sugar - This is used in the crust and the filling.
- Salt - Fine sea salt or table salt.
- Butter - Unsalted butter is always best.
- Rhubarb - Always use fresh rhubarb for a galette. I find that frozen rhubarb, even when defrosted, doesn't hold its shape the way I'd like when baked at high heat.
- Cornstarch - Swap flour or tapioca starch if needed.
- Orange zest - I love a bit of orange zest in the filling. You can also try lemon zest. Omit if needed.
Variation Ideas
- Add berries. Turn this into a gluten free strawberry rhubarb galette by adding ¼ cup of sliced strawberries, or a raspberry rhubarb galette by adding ¼ cup of raspberries to the filling.
- Use honey. Rhubarb and honey a natural pairing. Swap the sugar for honey in the filling.
- Vanilla. Stir in 1 teaspoon of pure vanilla extract or vanilla bean paste for extra depth of flavor.
- Spice. A pinch of ground cinnamon or ginger (about ½ teaspoon) will add warmth to the filling.

How to Cut the Rhubarb?
I prefer to cut the rhubarb stalks into "matchstick" shapes, as shown above in the photo. There's no need to peel the rhubarb; just give it a wash first and trim the ends. Then slice the stalks thinly - this will help them to cook more quickly. If possible, try to cut the stalks into uniform-ish shapes so that they bake uniformly. If you prefer, you can also chop the rhubarb into ¼-inch pieces for a different look.

Step-by-Step Instructions
Here's an overview in photos of how to make a rhubarb galette:

1. Make crust: In a bowl, combine the galette dough ingredients. Chill for at least 30 minutes.

2. Roll dough: After the dough has chilled, roll it out on a piece of parchment to form a 12-inch circle.

3. Assemble: Arrange the filling in the center of the dough, then fold it up.

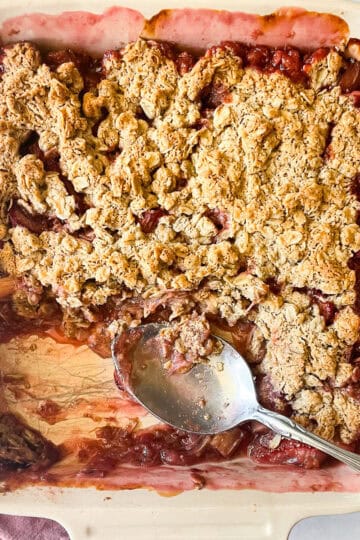
4. Bake: Place in a 400F oven and bake for about 30 minutes.

Tips & Recipe Notes
- Make the dough ahead. You can make the gluten-free galette dough, well wrapped in plastic, up to 2 days in advance and store it in the fridge.
- Keep it in the fridge until ready to use. Keep the crust dough as cold as possible until you're ready to use it. Leave the dough in the fridge until the filling is prepared and you are ready to roll it out.
- Go carefully but quickly. If you've worked with gluten-free pie crust before, you know that it is not as sturdy as one made with regular flour. This is where the cold dough really helps. But it can warm up quickly, so try to fold it up fast yet carefully so that it doesn't tear (and if it does, it's OK! Just keep going and make it work.).
- Brush with egg wash. Brush the pastry dough with an egg wash made from whisking 1 egg with 1 tablespoon of water or milk before baking.
- Chill the assembled galette. This is especially important when using more delicate gluten-free dough. After assembly, place the galette in the fridge for up to 4 hours. This step helps it to keep its shape during baking.
- Be OK with the potential messiness. Galettes are a freeform pastry and won't always turn out aesthetically perfect, so let's embrace their messy, rustic nature.
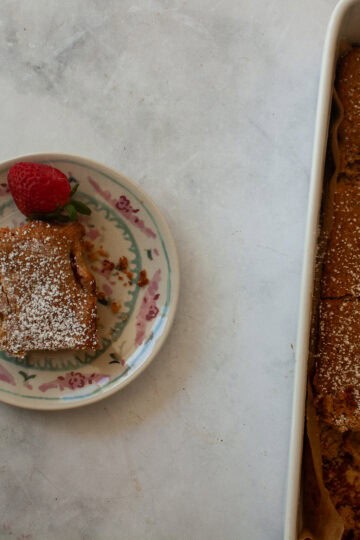
- To serve: Warm or at room temperature with whipped cream, vanilla ice cream, a drizzle of salted caramel sauce, dusted with powdered sugar, or just plain!
Proper Storage
- Counter - Cover the plate of galette with foil or place it in an airtight container and store on the counter for up to 3 days.
- Fridge - Transfer the galette to the fridge and store it for up to 5 days. Galette may be eaten cold or slightly warmed in the oven.
More Rhubarb Recipes
Happy baking! If you make this gluten free rhubarb galette recipe, I'd love to know. Please leave a comment below, reach out with any questions, and tag me on Instagram @Cucina Nicolina ❤️
Recipe
Easy Gluten Free Rhubarb Galette
Ingredients
Crust
- 1 large egg yolk
- 1 cup ice water
- 1 ½ cups gluten free flour (180 grams)
- 1 tablespoon granulated sugar
- ½ teaspoon fine sea salt
- 8 tablespoons unsalted butter , very cold, cut into about 8 pieces
Filling
- 2 stalks rhubarb , cut into matchstick shapes
- ½ cup granulated sugar
- 1 tablespoon cornstarch
- 1 orange zested
Instructions
Make crust
- Whisk the 1 large egg yolk with 1 tablespoon of ice water in a small bowl. In a large bowl, whisk together the 1 ½ cups gluten free flour, 1 tablespoon granulated sugar, and ½ teaspoon fine sea salt. Cut in the 8 tablespoons unsalted butter with a fork or your hands, working it in until crumbles form. Stir in the egg mixture, then add 2 tablespoons of ice water and stir until the dough comes together, adding more ice water by teaspoonfuls if the dough is dry. Gather the dough into a ball, flatten into a disc, and place it on a floured surface. Fold the dough over on itself about 8 times, then wrap in plastic and chill for at least 30 minutes.
Make filling
- Combine the 2 stalks rhubarb½ cup granulated sugar, 1 tablespoon cornstarch and the zested 1 orange in a bowl. Line a baking sheet with parchment.
- Roll out the chilled dough on the parchment to a 12-inch round. Arrange the prepared rhubarb in the center of the dough - you can do concentric circles or just pile it in, leaving a 1-inch plain border at the edge. Now, gently fold the dough border up over the outer edge of the filling. Fold and crimp the dough to create a decorative edge. Place the galette in the fridge to chill for 1 hour.
- When ready to bake, preheat the oven to 400°F. Place in oven and bake galette until rhubarb is tender and juices are bubbling, about 35-40 minutes. Cool galette for at least 20 minutes before serving.
Notes
- Make the dough ahead. You can make the gluten-free galette dough, well wrapped in plastic, up to 2 days in advance and store it in the fridge.
- Keep it in the fridge until ready to use. Keep the crust dough as cold as possible until you're ready to use it. Leave the dough in the fridge until the filling is prepared and you are ready to roll it out.
- Go carefully but quickly. If you've worked with gluten-free pie crust before, you know that it is not as sturdy as one made with regular flour. This is where the cold dough really helps. But it can warm up quickly, so try to fold it up fast yet carefully so that it doesn't tear (and if it does, it's OK! Just keep going and make it work.).
- Brush with egg wash. Brush the pastry dough with an egg wash made from whisking 1 egg with 1 tablespoon of water or milk before baking.
- Chill the assembled galette. This is especially important when using more delicate gluten-free dough. After assembly, place the galette in the fridge for up to 4 hours. This step helps it to keep its shape during baking.
- Be OK with the potential messiness. Galettes are a freeform pastry and won't always turn out aesthetically perfect, so let's embrace their messy, rustic nature.
- To serve: Warm or at room temperature with whipped cream, vanilla ice cream, a drizzle of salted caramel sauce, dusted with powdered sugar, or just plain!
Helen Spiridakis says
Yum!!! A winner!