Here's everything you need to know about how to make a wedding cake, with lots of tips, tricks, and recipe suggestions from someone who has done it more than once!

Congratulations! You're getting married! Or you're making the cake for someone special. If you've ever wondered if making your special occasion cake from scratch is possible, I'm here to tell you it's completely doable. That's not to say it won't involve time, effort, and a lot of sugar, but it is such an amazing experience to bake a wedding cake that I believe it's more than worth it. (In fact, I wrote an article about a DIY Wedding Cake for NPR many years ago, and you can read more about my experiences in that story.)
The first step toward baking a wedding cake is planning. The home baker doesn't need a huge kitchen, although enough counter space is a bonus (however, I baked my wedding cake (shown above!) in a tiny apartment kitchen with a small oven, and it turned out great. Work with what you have!). Decide on your flavors and if you want a large or small cake.
Then, you work out the sizing and how many servings you'll need. Next, you figure out just how many batches of your preferred cake recipe are necessary (see some helpful links to cake calculators lower down in this post). If you're doing a tiered wedding cake, you'll treat each tier as its own cake-they can all be the same flavor, or you can mix and match the fillings and frostings if you wish. Stack them up, add decorations like flowers and ribbons, and admire your hard work!
I'll get into all the details of a DIY wedding cake below.
Jump to:
Here's What's Great About Making a Homemade Wedding Cake
- It's customizable. You can make any type of cake you wish, from a vegan cake to a gluten-free cake, to your favorite cake flavor made with all-purpose flour.
- You can use better ingredients. When you bake your wedding cake from scratch, YOU get to decide what ingredients go into it rather than the bakery. That means no preservatives or weird additives.
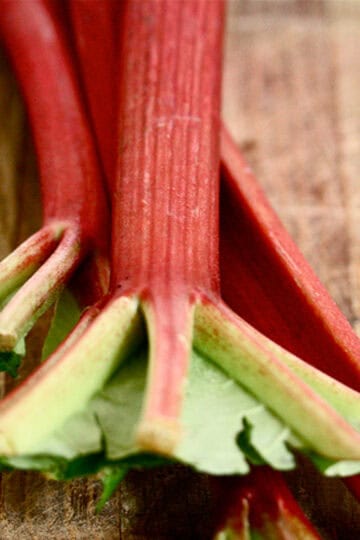
- You'll get to make it your own. By baking the cake yourself, you can incorporate as many or as few flavors as you wish! Try interesting combos like rhubarb and vanilla, almond and cherry, pistachio and rosewater, or just chocolate and chocolate!
- It's so much better than a bakery. Homemade always tastes better, and I stand by that statement! Your cake will be fresher, too, and will have that special homey touch.
- And it's economical. Let's not discount this one-a major reason to make a homemade wedding cake is that you'll save money.

How to Make A Homemade Wedding Cake
First, decide on the flavors you wish to incorporate. For my wedding cake, I made a vanilla cake and filled it with homemade lemon curd and homemade blackberry jam. I frosted it with a simple vanilla buttercream frosting, then we decorated it with the flowers my florist gathered for the event.
I also made a small chocolate cake filled with chocolate ganache and frosted with chocolate buttercream as a surprise layer in the middle (I like options). But as mentioned, the sky's the limit when it comes to cake flavors! Once you've nailed those down, you should do a test run of baking the cake and whatever filling and frosting you will use to ensure it tastes good and you like it. Tweak as necessary.
After you've finalized your flavors and sizing, get to baking! Here's how I do it:
- Bake the cake. Bake all of the cake layers in the sizes you've chosen. For a multi-cake creation, you will need to invest in different sizes of pans. You'll also have to calculate how much cake you will need, depending on how many guests will be attending. Here's a handy cake calculator to help figure out portions. I like to make a little bit extra because leftovers are always appreciated. Here is how to scale cake batter to fit any pan.
- Refrigerate or freeze. You can bake the cake whenever you have time and freeze it for up to 3 months. Make sure to wrap each layer in a layer of plastic, then a layer of foil, and store it in the freezer. Thaw the cake in the fridge before filling and frosting it. Or, make the cake up to 2 days in advance and keep it in the freezer. This will help the crumb hold together better when you fill and frost it.
- Make the filling. You can either buy or make a homemade filling (jam, ganache, frosting, honey lemon curd, or whatever you like) and have it ready a day before you assemble the cake.
- Make the frosting. I like a more rustic wedding cake, so I made a huge batch of white-colored vanilla buttercream. You may also use fondant (colored or not) for a more streamlined appearance. Make the frosting the day you will assemble the cake layers.
Prepping the Tiers
When you are ready to assemble the cake tiers (no more than 2 days in advance of the wedding), I recommend investing in a cake decorating stand that rotates (spins). This will help as you smooth on the frosting. Treat each cake layer as an individual cake, so you'll put it together, then stash it in the fridge until you build the tiers.
For each cake, my method is as follows:
- Divide each layer: I like thin layers of cake. Evenly slice each layer in half.
- Fill: Spread filling or frosting in an even layer across the base of the bottom layer, leaving a slight gap around the edges. Place on the next layer and repeat. Finish with a layer of cake.
- Crumb coat: This is an ESSENTIAL step for all cakes, but especially when you are making a cake for which you want a beautiful presentation. A crumb coat seals in any cake crumbs that can lead to lumpy, crumb-y frosting (yuck!). Learn how to do this below.
- Frost: After the crumb coat, use an offset spatula to add a thick layer of frosting to the top and sides of the cake, using the rotating cake stand to help you smooth out the frosting. You can dip the spatula in hot water to help with this. Or, cover the top and sides with fondant.
- Refrigerate: Place all of the assembled cakes in the fridge and keep them cold until you are ready to put together the wedding cake.
How to Do a Crumb Coat
This easy little step will lead to better-looking cakes every time! Here's how to do it:
- Get ready: Have your frosting bowl and an offset spatula ready.
- Add frosting: After you've assembled the cake, spread a thin layer of frosting on the top and sides of the cake. It can be quite thin, but it will seal in the crumbs,
- Place in fridge: Now, place the cake in the fridge for about 15 minutes. This allows the frosting to set. When you add the final layer of frosting, you won't have any crumbs. Yay!
Build the Cake
This is the most fun and slightly nerve-wracking part: Stacking up the tiers! You can use cardboard and wooden dowels to stack up the cake, or you can use cake boards. I like to assemble the cake on site to prevent any mishaps, but you can also assemble it in your home kitchen and adjust if needed when you bring it to the venue.
- Start with the base: The easiest layer is your large base layer. Place it on a cake serving plate, stand, or piece of cardboard (my choice is below).
- Add dowels: Cut plastic or wooden dowels to size them so that they just reach the top of the cake. Place 4 cake dowels in the bottom tier.
- Add cake board: Then add a cake board that will fit the size of the next tier (a piece of cardboard that adds stability).
- Continue: If you are doing a 2-tier cake, you're done! Otherwise, repeat this process for each cake, cutting the dowels and matching the cake board to size.
- Touch up: After you've stacked up the tiers, have your frosting ready and smooth out any spots that got messed up during assembly. You can also add some frosting in between the layers if there are any gaps.
- Decorate: When the cake is assembled, decorate it!

A Few Tips
Here are a few more thoughts on what you'll need and what I find helpful when baking wedding cakes:
- Reliable recipes: See some of my favorites below. This also means: test, test, test! Share extras with neighbors, friends, coworkers, etc.!
- Proper cake pans: Make sure to use sturdy, good-quality cake pans in the sizes you choose (preferably two of each size so that you can bake layers at the same time). Wilton is a good brand for this and many other cake-baking needs.
- Cardboard cake rounds: These serve as a base for each tier, which is an entire cake, right?, and to bolster against collapse.
- Cake strips: These wrap around each baking pan to help the cakes bake evenly and to a level surface. This may seem a bit odd, but it really works.
- A study cake base: You can purchase a base-this will go underneath the bottom level tier-or use a thick, sturdy piece of cardboard wrapped in foil or parchment paper. Wilton has a nice simple silver flat base.
- Wooden dowels or plastic rods: You will cut to size and insert them into the bottom layer and the middle layers to provide support for the heavy cake layers when they're stacked on top of each other.
- A book!: Or at least Internet searching. Even if you have no qualms about taking on this project, it's a comfort to read how others did it, and simply looking at many homemade wedding cakes will give you confidence that yes, indeed, you can absolutely do this.
Recipes to Use
Here are a few of my recipes that would work for a homemade wedding cake, or see my recipe outlined at the end of this post. You can of course use any recipe you love!
Further Reading
Here are some resources that I recommend reading to help you on your wedding cake baking journey:
- Wilton's excellent Wedding Cake Guide
- BBC's Creating Your Wedding Cake
- Bon Appetit's How to Bake a Wedding Cake
- My NPR article DIY Wedding Cake - The Secret Ingredient is Love, including my favorite wedding cake recipes
- My post on baking my first wedding cake
- Serious Eats' How to Scale a Recipe for Cake Batter to Fit Any Pan
- Another cake size and portions calculator
A Final Note
It's more than OK if your homemade wedding cake may not look as polished and professional as a bakery cake. It will look real and personal, and everyone will remember that it was made with heart, and most important of all, love. Try to enjoy the process-I know I did!
Recipe

Homemade Wedding Cake Recipe
Ingredients
- 1 cup lemon curd
- 1 cup strawberry jam
For the Cake
- 4 teaspoons baking powder
- ½ teaspoon fine sea salt
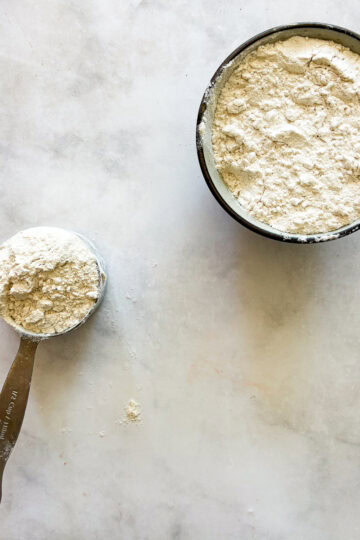
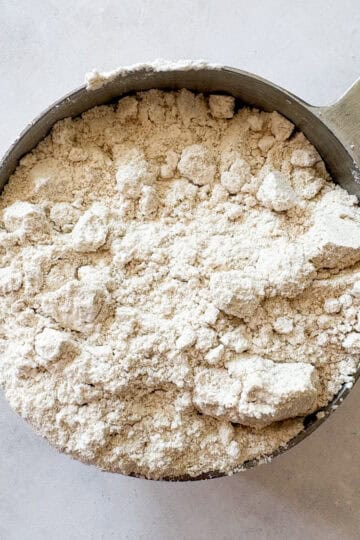
- 3 cups all-purpose flour
- 1 cup unsalted butter softened
- 2 cups sugar
- 4 large eggs separated
- 1 teaspoon pure vanilla vanilla extract
- 1 cup whole milk
For the Vanilla Butter Cream
- 1 cup unsalted butter, at room temperature
- 6 cups confectioners' sugar
- 2 tablespoons whole milk plus more, if needed
- 2 teaspoons pure vanilla extract
Instructions
Make Cake
- Preheat oven to 350℉ degrees. Butter two 9-inch baking pans and line the bottom of each with parchment paper (note: sometimes I like to bake this in three layers; each layer is thinner than if you use two pans, but simply divide evenly between however many pans you choose to use). Butter the paper and dust the pans with flour, tapping out the excess.
- Whisk baking powder and salt into flour.
- In another bowl, beat butter and sugar until light and fluffy. Beat in the egg yolks one at a time. Add the vanilla to the mixture.
- Add the flour mixture and milk alternately, starting and ending with one third of the flour. Stir just until the flour is incorporated.
- In another bowl, whisk or whip egg whites to soft peaks. Stir one-third of the egg whites into the batter, then gently fold in the rest. Pour the batter into the prepared pans and bake until a toothpick inserted into the center comes out clean, 30 to 40 minutes.
Make Buttercream (about 4 cups)
- In a large bowl, combine the butter, confectioners' sugar, milk and vanilla and beat on low speed until combined, about 1 minute. Stop the mixer and scrape down the sides of the bowl. Increase the speed to medium and beat until fluffy, about 3 minutes.
- If the frosting is dry, add more milk, 1 teaspoon at a time, until it is creamy but still holds peaks.
Assemble
- Layer the cake with the strawberry jam and lemon curd and frost it with the buttercream.

I'd love to hear from you! Please leave me a note.