The sweetest little recipe for bunny bread that's meant for small hands! An easy, yeast-based dough is simple to mix, fun to knead, and bakes up into irresistibly soft, golden bunnies perfect for springtime celebrations.

You might find it hard to nibble on these impossibly cute bunny-shaped breads (they work great as decorations, too), but they are a wonderful Easter treat, or whenever the whim strikes.
I love baking these cuties with my kids - they love art and creating with clay, so making shaped breads is a natural fit! The dough is so sturdy and pliable, meaning that there won't be any frustration on the part of the younger set. There's also plenty of kneading involved (a favorite part for my two) and just a quick rise so there's not too much waiting around.
Shape the breads, add raisins for eyes, or try other shapes, too. Serve bunny bread at Easter dinner along with softened butter, or anytime you want something fun and special. I've also included gluten-free directions to easily make these bunny breads in a gluten-free version.
Jump to:
Why I Love This Adorable Bread
I've always brought my girls into the kitchen with me, and over the years, we've built a list of go-to recipes that they can help make, like oat flour chocolate cake, gluten free butter cake, and gluten free funfetti cupcakes. Bunny bread has now earned a permanent spot on that list. We've been baking these sweet little bunnies for years, and this recipe remains one of the absolute best both to make and to eat. It's:
- So easy. Unlike some bread recipes, this one was made for younger bakers. The instructions are straightforward, and the dough is super easy to work with while shaping it.
- Yummy! While the main highlight of bunny bread is, well, the bunny shape, the bread also tastes delicious! It would make a wonderful start to Easter dinner, served warm with plenty of butter.
- Makes a great gift. You can wrap each bunny in pretty, colored cellophane, tie it with a pastel ribbon, and gift the bread to grandparents and neighbors.
- Unique. Skip the traditional rolls and make shaped bread! You'll love how special these bunnies turn out, and you will especially love the oohs and aahs from the kids when they come out of the oven.

Ingredients Needed
Simple ingredients come together to make something magical, and I've outlined them below. Make sure to scroll down to my recipe card at the bottom of this post for the full ingredient amounts and instructions!
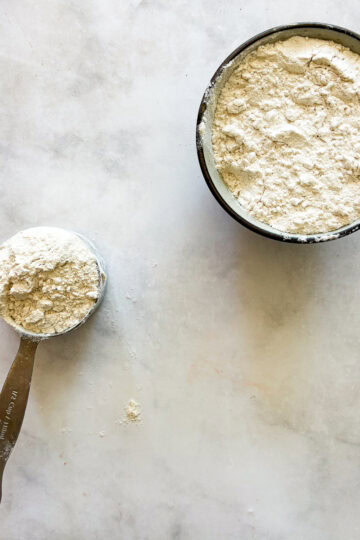
- Flour - Use the scoop and level method to measure the flour for accuracy. See my note on baking this gluten-free below - it's totally possible!
- Instant yeast - I use instant yeast rather than active dry yeast so that I don't have to proof it first. You can stir it straight into the flour. However, if you only have active dry yeast, you can proof it in the warm water, then add it to the dough along with the other wet ingredients.
- Sugar - A tiny bit of granulated sugar adds a hint of sweetness.
- Salt - I always use fine sea salt, and table salt works fine, too.
- Water
- Milk - I used whole milk, and 2% milk will also work.
- Butter - Unsalted is best; if you only have salted butter, reduce the amount of salt by ½ teaspoon.
- Egg - A large egg at room temperature adds fluffy texture to the bread.
- Raisins - These are optional for decorating, but they really make the bunnies extra cute.
Make This Gluten-Free
The best way to make this recipe gluten-free is to use my homemade gluten free bread flour recipe or King Arthur Flour's Bread Flour, which miraculously performs very similarly to wheat flour. You can use 5-6 cups of this flour in place of the all-purpose flour, and follow the rest of the recipe instructions. This is an easy way to make this recipe gluten-free without a lot of extra ingredients!

How to Make Bunny Bread
Here's an overview in photos of how to make this recipe:


- Combine dry ingredients: In a large bowl, mix together 3 cups of the flour, yeast, sugar, and salt.
- Mix wet ingredients: Combine the water, milk, and butter, then heat to 130℉.


- Combine: Stir the milk mixture into the flour mixture, then stir in the egg. Add more flour to form a dough.
- Knead: Turn out the dough and knead for 10 minutes.


- Rise: Cover and let the dough rest for 10 minutes.
- Form bunnies: Divide the dough into four equal pieces.


- Make body: For each bunny, shape the bodies using a round of dough and place them on a lined baking sheet.
- Add ears etc: Form tails, ears, and heads and press them onto each body.one half into a round for the body, then lightly flatten it.


- Let dough rise: Cover the dough and let it rise for up to 30 minutes.
- Decorate: Add raisins if using.


- Bake: Place in the oven and bake for about 18-20 minutes at 400F.
- Cool: Let the bunnies cool slightly before serving.
Tips for Baking with Kids
- Do some prep. It's so helpful to set out the ingredients and clear the counter before you start. Then you won't be hunting around for everything (raises hand). Let older kids measure out the flour and pour in the water, too.
- Let them lead. Resist the urge to correct every misshapen bunny or clean up every floury countertop. The joy is in the doing, and kids thrive on getting to DIY.
- Bake smaller portions. Kids love having their own bunny to shape and eat. Divide the dough into mini bunnies for individual servings, or simply share the bunnies after they're baked.
- Try other shapes. My oldest made an octopus bread, and it was beyond cute. Use this dough base for any shape you love!

Tips & Variation Ideas
- Use warm water. Because we don't proof the yeast, the water/milk mixture needs to be heated up. Use a thermometer to measure it to about 125°F to activate the yeast perfectly.
- Keep kneading! This dough loves a good knead-about 8-10 minutes by hand makes it soft, elastic, and easy to shape into bunnies. Bonus is that kids tend to love this part, so let them have at it.
- Decorate! Use raisins, currants, or dried cranberries for eyes (and ears, if you like).
- Cool before storing. If you don't plan to eat these right away, let the bunny breads cool completely on a wire rack before storing in an airtight container. This will help them to stay nice and soft.
- Add whole wheat flour. For a more whole-grain bunny, substitute 2 cups of whole wheat flour or whole wheat pastry flour for 2 cups of the all-purpose flour.
- Make them sweeter. For a more dessert-y take on bunny bread, add ½ cup of sugar to the dough and press mini chocolate chips into the bunnies for eyes when they come out of the oven. For even more decorative cuteness, make a simple powdered sugar glaze and drizzle it over the bunnies. Or, add a touch of food coloring and use it to "paint" them with spring color.
- Can I bake these in other shapes? Absolutely! In fact, you should! You can form the dough for any holiday celebration (try a reindeer or trees at Christmas, pumpkins or wee ghosts for Halloween), or make it into traditional rolls. The bread bakes up soft and fluffy, making it a worthy addition to any table.

Proper Storage
- Counter - Cool the bread thoroughly, then place it in an airtight container or sealable plastic bag. Store the bread on the counter for up to 2 days.
- Freezer - Place the cooled bread in a sealable, freezer-safe bag and store it in the freezer for up to 3 months. Thaw the bread completely in the fridge before serving.
- To Rewarm - I love these bunnies served slightly warm! Place them on a baking sheet and gently warm them in a 250°F oven until warm.
Recipe

Bunny Bread
Ingredients
- 5-6 cups all-purpose flour
- 2 packages instant yeast about 4 teaspoons
- 3 tablespoons granulated sugar
- 2 teaspoons fine sea salt
- 1 cup water
- ⅔ cup whole milk
- 3 tablespoons unsalted butter
- 1 large egg
- raisins optional, for decorating
Instructions
- In a large bowl, mix together 3 cups of flour, the 2 packages instant yeast, 3 tablespoons granulated sugar, and 2 teaspoons fine sea salt. In a small bowl, combine the 1 cup water, ⅔ cup whole milk, and 3 tablespoons unsalted butter, then heat it to about 125-130℉. Stir the milk mixture into the flour mixture, then stir in the 1 large egg. Add a little more flour as needed to form a smooth dough.
- Turn the dough out onto a lightly floured surface and knead it until smooth and elastic, 8-10 minutes. Cover and let the dough rest for 10 minutes.
- Line two baking sheets with parchment paper.
- To form the bunnies, divide the dough into four equal pieces. For each bunny, divide one part of a dough piece into halves. Shape one half into a round for the body, then lightly flatten it. Place it on a baking sheet. Take a walnut-sized piece of dough and form it into a round tail, then make an indentation on the body and press and flatten the tail into it.
- Divide the remaining dough into halves. Shape one half into a flattened round for the head and gently press it onto the body. Shape the remaining half into ears and feet and attach them to the top and bottom of the body (NOTE: We skipped making feet).
- Preheat the oven to 400℉. Cover the dough and let it rise for 15-30 minutes. Add raisins if using. Place in the oven and bake for about 18-20 minutes, until the bunnies are light brown.
Notes
- Use warm water. Because we don't proof the yeast, the water/milk mixture needs to heated up. Use a thermometer to measure it to about 125°F to activate the yeast perfectly.
- Keep kneading! This dough loves a good knead-about 8-10 minutes by hand makes it soft, elastic, and easy to shape into bunnies. Bonus is that kids tend to love this part, so let them have at it.
- Decorate! Use raisins, currants, or dried cranberries for eyes (and ears, if you like).
- Cool before storing. If you don't plan to eat these right away, let the bunny breads cool completely on a wire rack before storing in an airtight container. This will help them to stay nice and soft.
- Add whole wheat flour. For a more whole-grain bunny, substitute 2 cups of whole wheat flour or whole wheat pastry flour for 2 cups of the all-purpose flour.
- Make them sweeter. For a more dessert-y take on bunny bread, add ½ cup of sugar to the dough and press mini chocolate chips into the bunnies for eyes when they come out of the oven. For even more decorative cuteness, make a simple powdered sugar glaze and drizzle it over the bunnies. Or, add a touch of food coloring and use it to "paint" them with spring color.
Helen Spiridakis says
I loved making bunny bread with you and Kurt!
Nicole Spiridakis says
So fun, then and now!!
Helen says
This brings back memories!