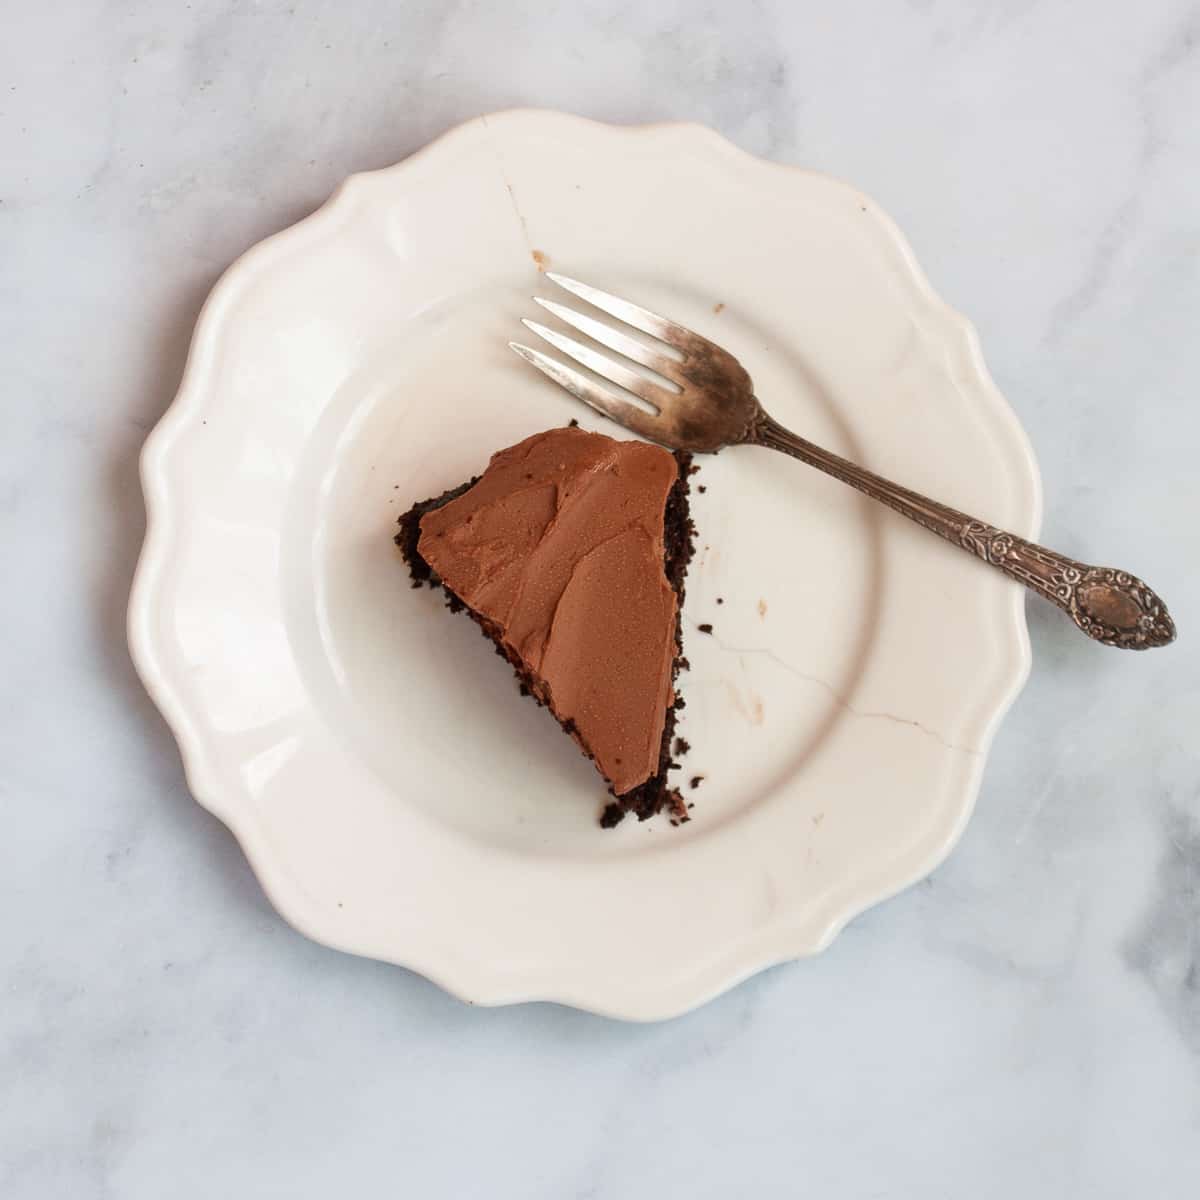
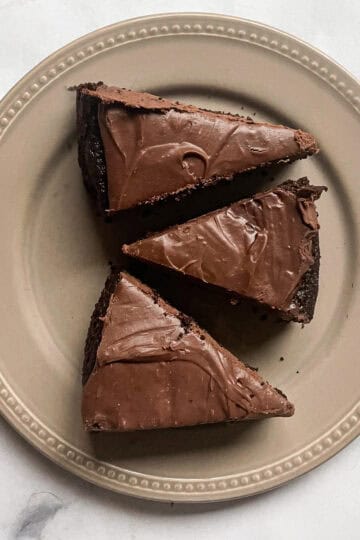
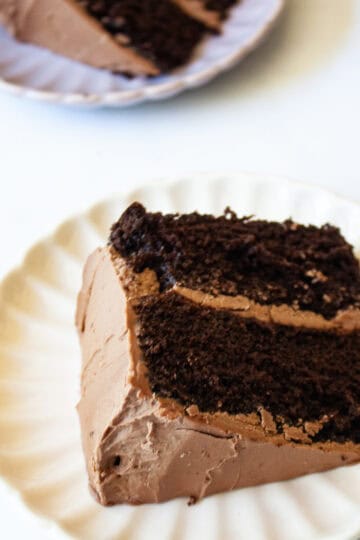
My gluten-free chocolate cake is a dream to bake and to eat! A riff on my best chocolate cake recipe, this is a deeply dark chocolate cake with a soft and tender crumb that's perfect layered and covered in fluffy chocolate buttercream. A truly special cake.

How about a gluten-free chocolate cake that's so good no one can tell it's gluten-free? Welcome to your new favorite chocolate cake! This beauty is moist and fork-tender, swathed in delicious chocolate buttercream or your favorite frosting, keeps well, and makes an amazing birthday cake! (Although, if you're a fan of the classic vanilla cake-chocolate frosting combo, my gluten free birthday cake recipe is stellar.)
Like my oat flour chocolate cake and my gluten free chocolate layer cake recipes, this easy, delectable cake is made without a mixer and relies mostly on pantry ingredients. I love adding buttermilk and coffee here; they play so nicely against the cocoa powder and brown sugar, bringing a depth of flavor that takes this cake beyond an ordinary chocolate cake. Get the sprinkles ready and whip this up for the next birthday on the calendar!
Jump to:
What Makes This Cake Special?
I'm so glad you asked! It's:
- Easy! To make the cake itself, a whisk and a spoon are all that's needed. My 12-year-old put this one together recently without a hitch.
- Undetectably gluten-free. I love serving gluten-free cakes and then after everyone has enjoyed their last bite, casually mention that it was a gluten-free. My goal, as always, is to create recipes that no one can tell are made without wheat flour!
- Versatile. You can use whatever frosting you love here, no need to stick with chocolate if you want to mix it up. Use this recipe as a solid base for anytime you want to make a chocolate cake.

Ingredients Needed
Here's a look at the ingredients that go into this cake, plus some notes. Make sure to scroll down to my recipe card at the bottom of this post for the full ingredient amounts and instructions.
- Gluten free flour - I used my homemade gluten free flour blend here and I highly reccomend it! You could also use a single-origin gluten free flour like oat flour or brown rice flour, or your favorite 1:1 gf blend.
- Sugars - A combo of brown sugar (light or dark) and granulated sugar.
- Cocoa powder - Make sure to use unsweetened cocoa powder! I like Dutch process, but any unsweetened cocoa powder is fine.
- Leavening - Baking soda and baking powder.
- Salt - Fine sea salt or table salt is fine.
- Oil - Any oil works, from canola or vegetable oil, to coconut oil and olive oil.
- Eggs - Use large or medium sized eggs.
- Buttermilk - I love using real buttermilk here for a lovely, tender crumb. Sometimes I switch in plain whole milk yogurt, which works wonderfully as well.
- Vanilla - Use pure vanilla extract or vanilla bean paste.
- Coffee - Freshly brewed, hot coffee adds a depth of flavor to the chocolate. If you don't drink coffee, water or tea is fine, too.
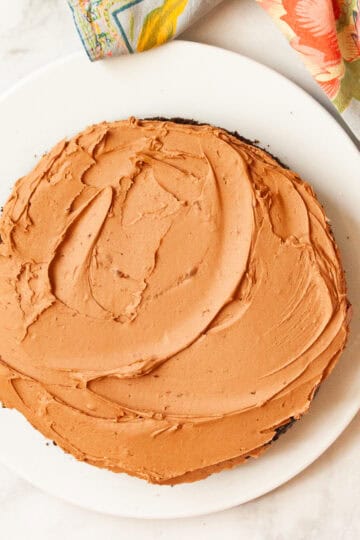
- Frosting - I used my chocolate buttercream frosting recipe here, as I love the chocolate-chocolate pairing, but you could use any frosting you like!

Step-by-Step Instructions
Here's an overview in photos of how to make this luscious choco cake:

1. Combine dry ingredients: In a large bowl, whisk together all of the dry ingredients until well combined.

2. Mix eggs: In a medium bowl, whisk together the eggs, oil, buttermilk, and vanilla.

3. Make batter: Stir the dry mix into the wet ingredients, then stir in the coffee. Portion the batter into 2 greased and lined baking rounds, then rest it for 15 minutes.

4. Bake & cool: Place the cake in a 350°F oven and bake for about 45-50 minutes. Cool completely before frosting.
Frosting & Serving Ideas
- Buttercream - Chocolate, vanilla, caramel (made with salted caramel sauce), or peanut butter!
- Whipped cream - To fill or just to spread liberally on the exterior.
- Cream cheese - Make the maple cream cheese frosting from my gluten free pumpkin snack cake recipe, or the cream cheese frosting I love on my gluten free chocolate stout cake.
- Make a single layer and freeze the other - Freeze one layer for another time (see how below), defrost it, then make the frosting when you're ready to serve.
- Plain - Leave off the frosting and serve slices plain with ice cream or whipped cream.
- With jam - Spread strawberry honey jam (or a jam of choice) and whipped cream between the layers, then finish the top with more whipped cream.

Tips & Recipe Notes
- Do a crumb coat. This is a softer cake, and crumbs will inevitably flake off when you add the frosting to the assembled cake. To avoid a crumby frosting, spread a thin layer of frosting to the exterior of an assembled cake, then place in the fridge for about 10-15 minutes. Once the crumb coat is set, go ahead and finish frosting the cake with a thicker layer of frosting. See the photo above for an example of how the crumb coat will look.
- Rest the batter. Let the batter rest while the oven heats. All gluten-free flours need time to hydrate before baking, so make sure to let the batter rest for 10-15 minutes before baking it.
- Refrigerate before frosting. As noted, this cake is quite tender. I like to bake it well in advance of when I plan to frost it. If you can, let the cake rest overnight, wrapped or covered, in the fridge. This makes it a lot easier to frost when you're ready. Make sure the cake is fully cooled before frosting it, even if it's at room temperature!
- Refined sugar-free. Use coconut sugar or maple sugar in place of the granulated sugar and brown sugar.
- Dairy-free. Swap non-dairy yogurt for the buttermilk.

Proper Storage
I prefer letting the cake come to room temperature for about 20 minutes before serving it because it softens up both the cake crumb and the buttercream, but it's also delicious cold.
- Fridge - Store cake, tightly covered, in the fridge for up to 5 days.
- Freezer - Wrap the chilled, frosted cake in foil and store it in the freezer for up to 2 months. Thaw the cake thoroughly in the fridge before serving.
- Individual layers - Wrap each cooled layer in plastic, then foil, then freeze them for up to 3 months. Defrost the cake in the fridge before filling and frosting it.
More Gluten Free Chocolate Recipes

Happy baking! If you make this recipe, I'd love to know. Please leave a comment below, reach out with any questions, and tag me on Instagram @Cucina Nicolina ❤️
Recipe

Gluten-Free Chocolate Cake
Ingredients
- 2 ⅓ cups gluten free flour (280 grams)
- 1 cup brown sugar
- 1 cup sugar
- ¾ cup unsweetened cocoa powder
- 2 teaspoons baking soda
- 1 teaspoon baking powder
- 1 teaspoon fine sea salt
- ½ cup oil
- 3 eggs at room temperature
- 1 cup buttermilk , sour cream, or plain yogurt
- 1 teaspoon pure vanilla extract
- 1 cup fresh brewed hot coffee
Instructions
- Lightly grease two 8-inch pans with at least 2-inch sides with olive oil and line them with parchment paper rounds. Set aside.
- In a medium bowl, whisk together the 2 ⅓ cups gluten free flour, 1 cup brown sugar, 1 cup sugar, ¾ cup unsweetened cocoa powder, 2 teaspoons baking soda, 1 teaspoon baking powder, and 1 teaspoon fine sea salt.
- In a large bowl, whisk together the ½ cup oil, 3 eggs at room temperature, 1 cup buttermilk, and 1 teaspoon pure vanilla extract. Stir and whisk the dry ingredients into the wet ingredients, and stir very well to combine. Stir in the 1 cup fresh brewed hot coffee and stir until the batter is smooth and combined.
- Pour batter evenly into the prepared pans and preheat oven to 350°F. Let batter rest while the oven heats, about 15 minutes.
- Place pans in the oven and bake for 45-50 minutes, checking at 45 minutes, until a toothpick in the center comes out clean and the edges are starting to pull away from the sides of the pans. Remove from oven and let cake cool in the pans on a wire rack for 30 minutes, then turn out onto the rack to cool fully. The cake will be quite tender and soft - yum! - so it's a good idea to refrigerate it before frosting or do a crumb coat.
- Frost cake with or your frosting of choice, either as a layer cake or frost one layer and freeze the other for another time. Cake will keep well wrapped in the fridge for up to 5 days.
Notes
- Do a crumb coat. This is a softer cake, and crumbs will inevitably flake off when you add the frosting to the assembled cake. To avoid a crumby frosting, spread a thin layer of frosting to the exterior of an assembled cake, then place in the fridge for about 10-15 minutes. Once the crumb coat is set, go ahead and finish frosting the cake with a thicker layer of frosting. See the photo above for an example of how the crumb coat will look.
- Rest the batter. Let the batter rest while the oven heats. All gluten-free flours need time to hydrate before baking, so make sure to let the batter rest for 10-15 minutes before baking it.
- Refrigerate before frosting. As noted, this cake is quite tender. I like to bake it well in advance of when I plan to frost it. If you can, let the cake rest overnight, wrapped or covered, in the fridge. This makes it a lot easier to frost when you're ready. Make sure the cake is fully cooled before frosting it, even if it's at room temperature!
- Refined sugar-free. Use coconut sugar or maple sugar in place of the granulated sugar and brown sugar.
- Dairy-free. Swap non-dairy yogurt for the buttermilk.
Kath says
Delicious cake with wonderful texture. I made it once as written, and a second time I didn’t have GF rice flour so I used one cup almond flour, 3/4 cup oat flour— and it was even more moist and chocolatey. Highly recommend!